How To Download & Install Mods with Minecraft NeoForge
 15,137
 0
0
 September 30, 2023
NeoForge is a version of Forge that is backed by the original Forge developers. This mod-loader is relatively new and has versions starting from 1.20.1. Many prominent mod developers have already started adding NeoForge versions to their mod. In this article, we will give you step-by-step instructions on how you can download and install mods with the NeoForge mod-loader.

Quick Tutorial:
- Access the mods download page.
- Download your favorite mods.
- Press “Window+R” to open the Run command window, type “%appdata%” then press “Enter” to open The “Roaming folder”.
- Inside the “.minecraft” folder, you should see a folder named “mods”, place the mod pack you have just downloaded into this folder.
- Open the Minecraft launcher and choose to start the game with the “NeoForge version”.
- At the Minecraft main menu, click on the “Mods” button. Then choose “Open mods folder”, the “mods” folder will appear.
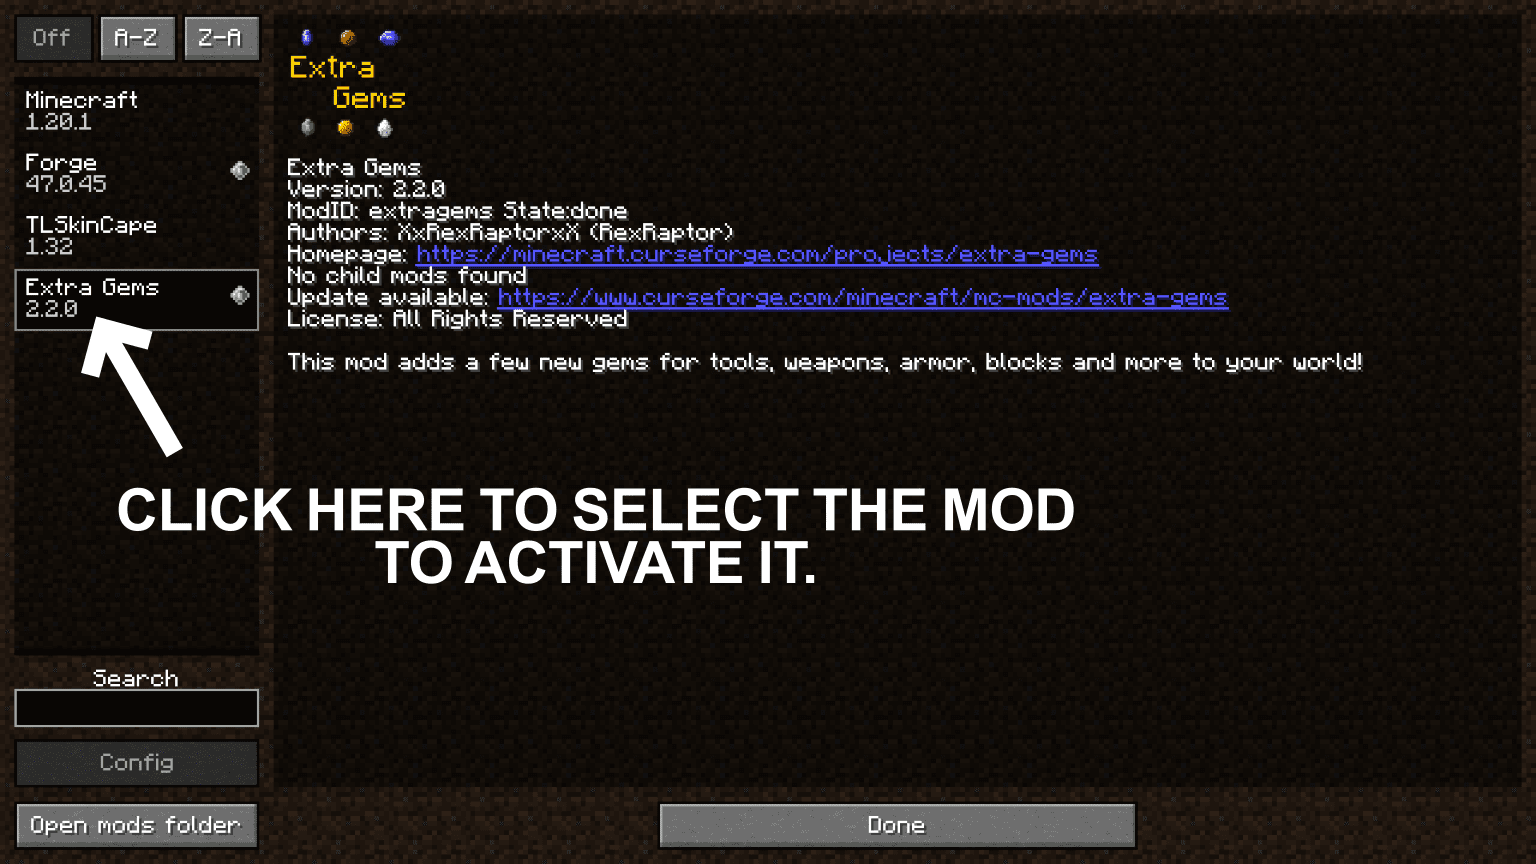
- Click on the name of the mod you want to install to activate it. Click “Done” to go back to the game and enjoy.
Detail Tutorial:
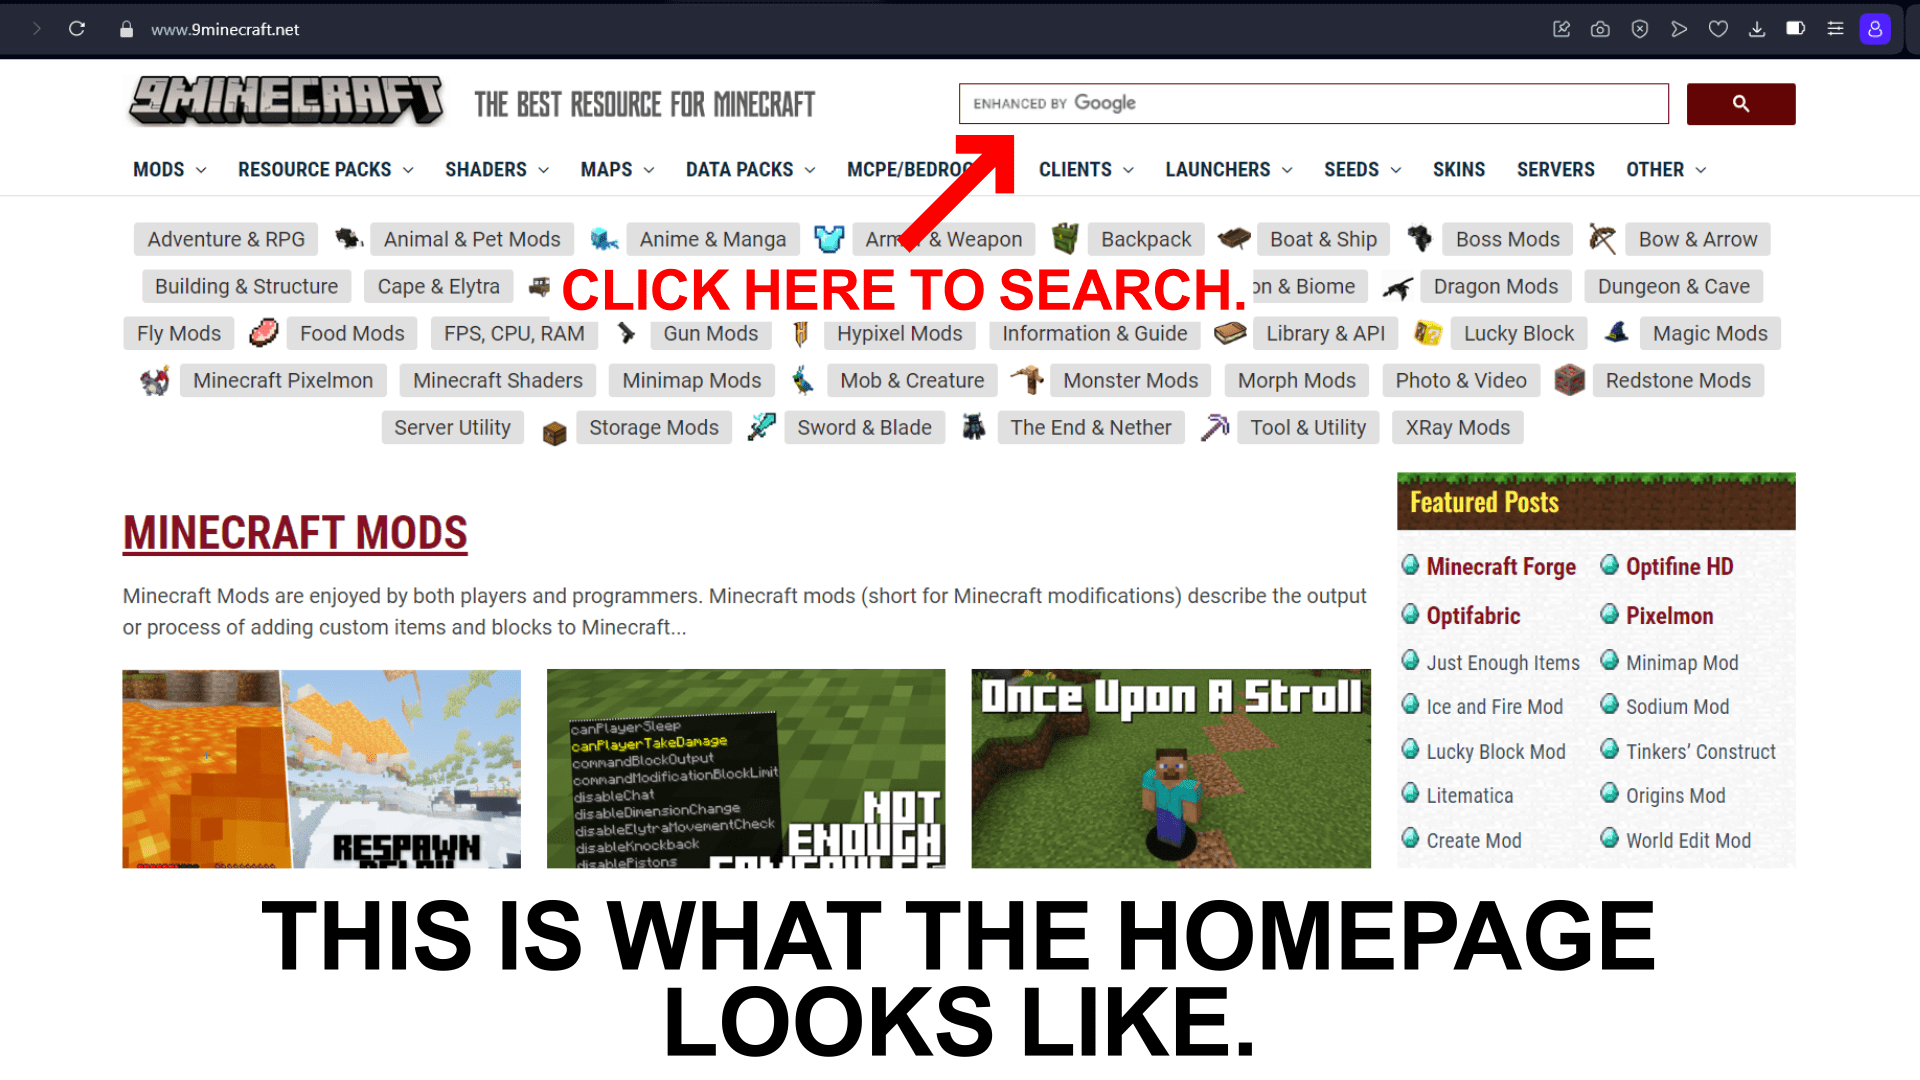
Step 1: Open the mod download page https://www.9minecraft.net/category/minecraft-mods/
- Our website offers you thousands of mods for you to browse and choose from. By clicking on the following link, you can access our mods page, from where you can choose your favourite mod and read reviews on it. You can also use the search bar to search for a specific mod of your choice.
Step 2: Download your favorite mod
- On the mod page, you can scroll to read our detailed review, important features of the mod and screenshots. These will help you choose your favorite mod.
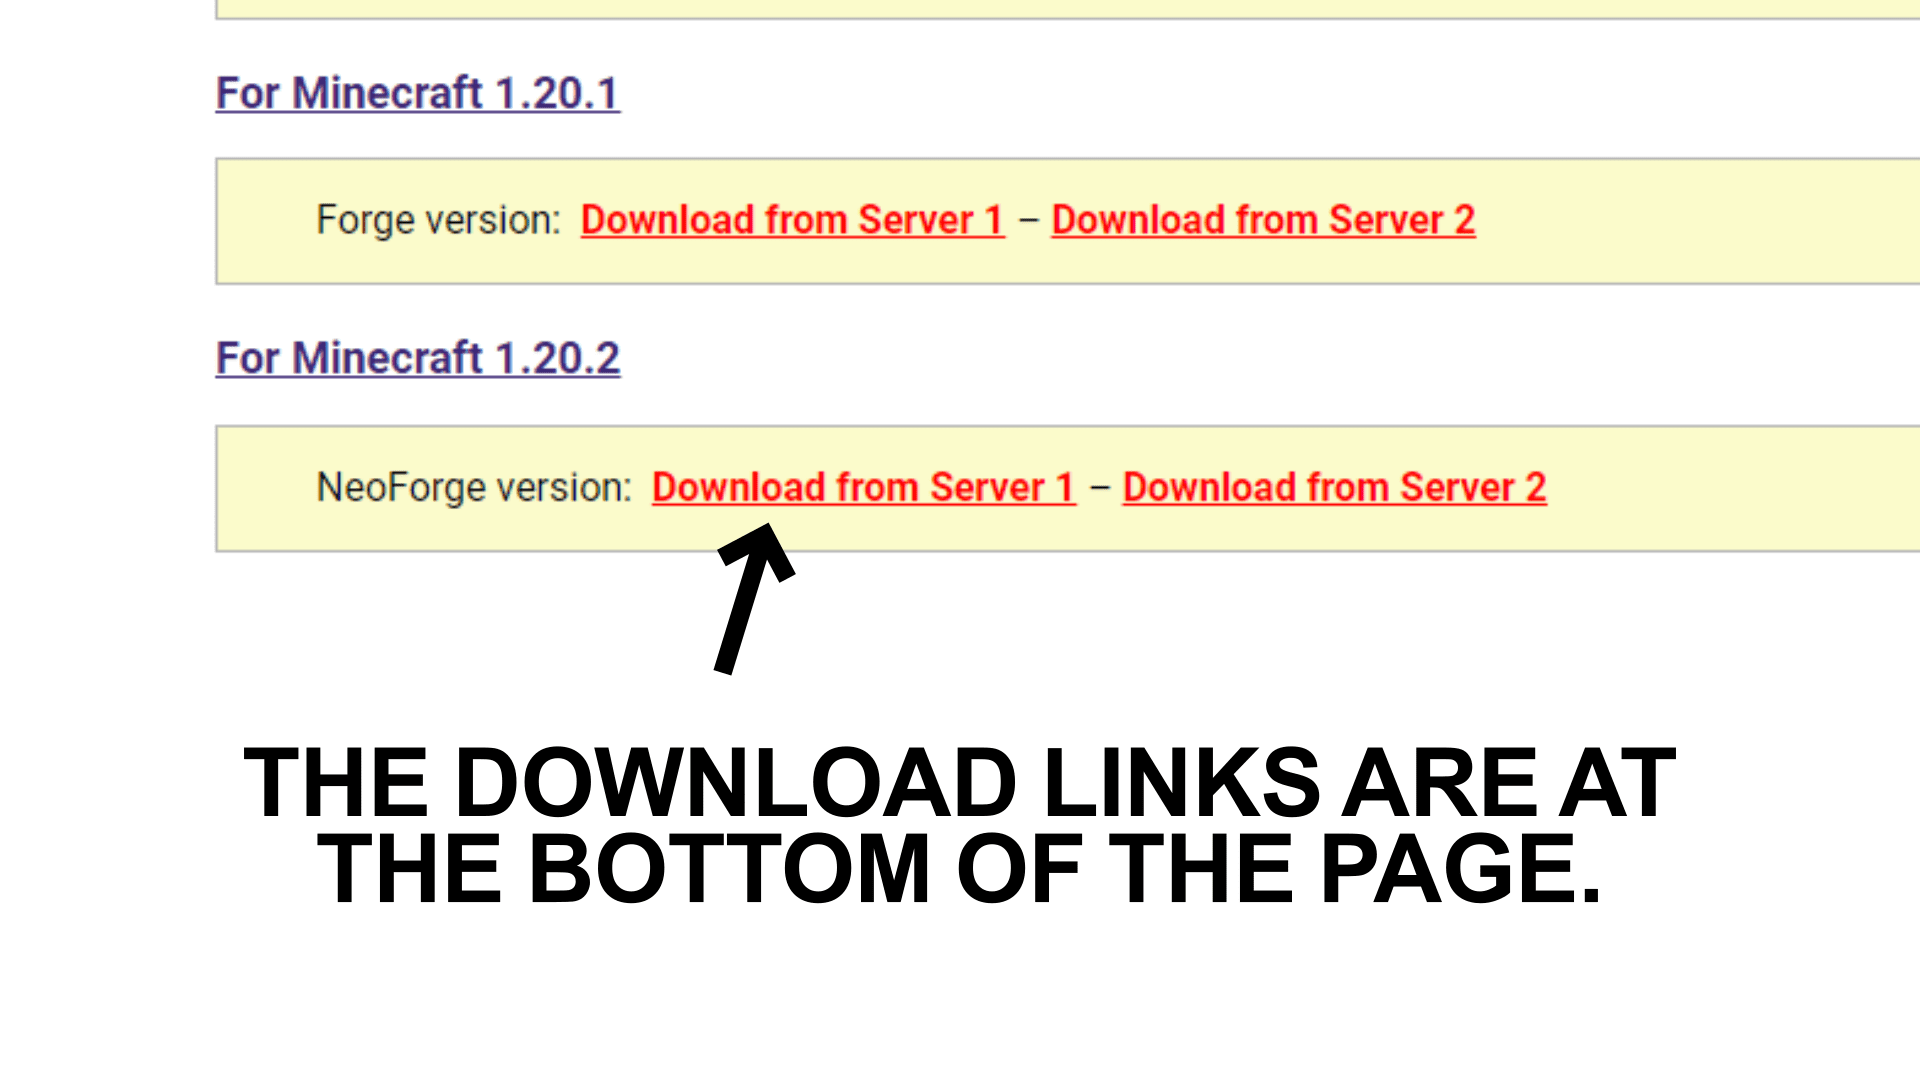
- After choosing your favorite mod, you can scroll down to the bottom of the page to find the download button. From here you have to find the version of the mod that matches with the version of Minecraft you are playing. For example, if you play Minecraft 1.20.1, you have to press the download button given in the 1.20.1 column.
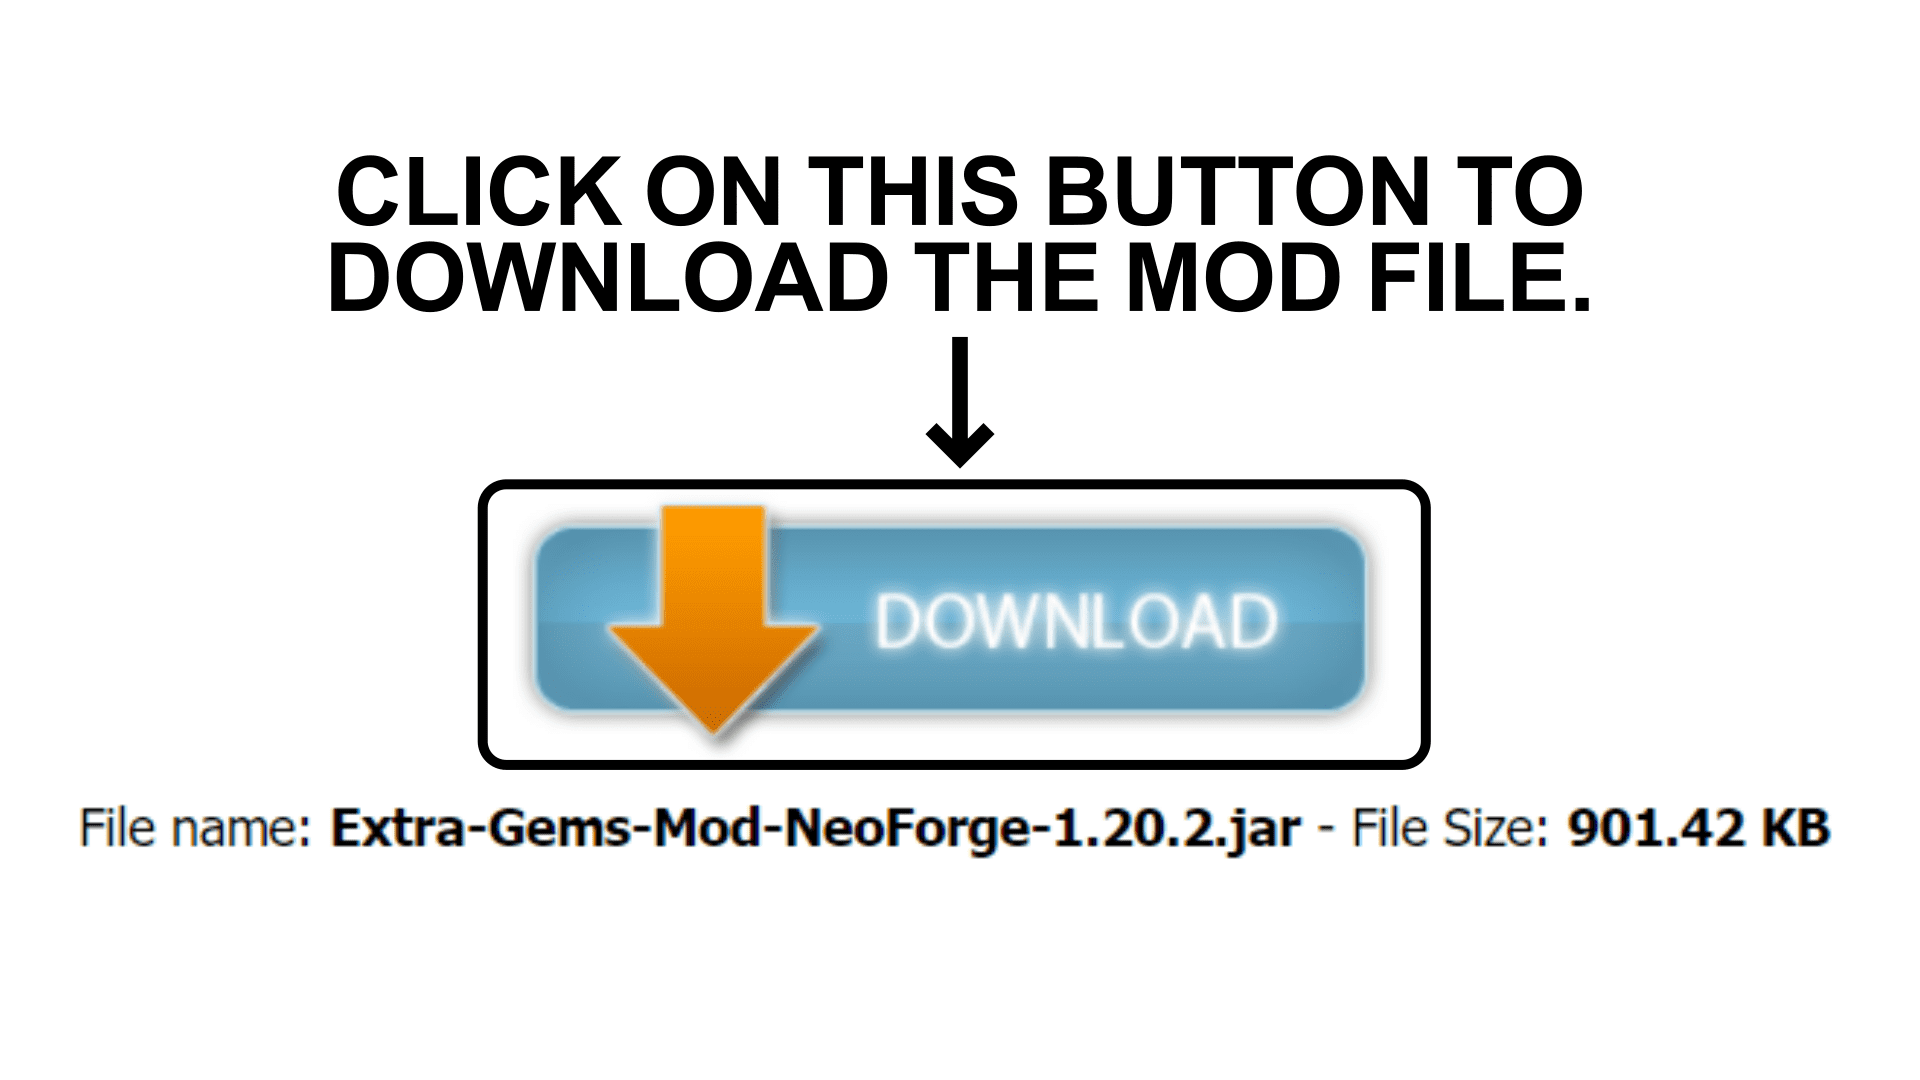
- Clicking on the download link will open a new window. From there, you have to click on the DOWNLOAD button. This will start the download.
Step 3: Open/Create the mods folder
Once you have successfully downloaded your mod, you have to put it in the correct folder for Minecraft to detect and activate it. Typically, it should be a folder called mods that you will find in the .minecraft folder. Here is how you can access that folder.
There are two ways in which you can access the mods folder.
- Open with Run Command
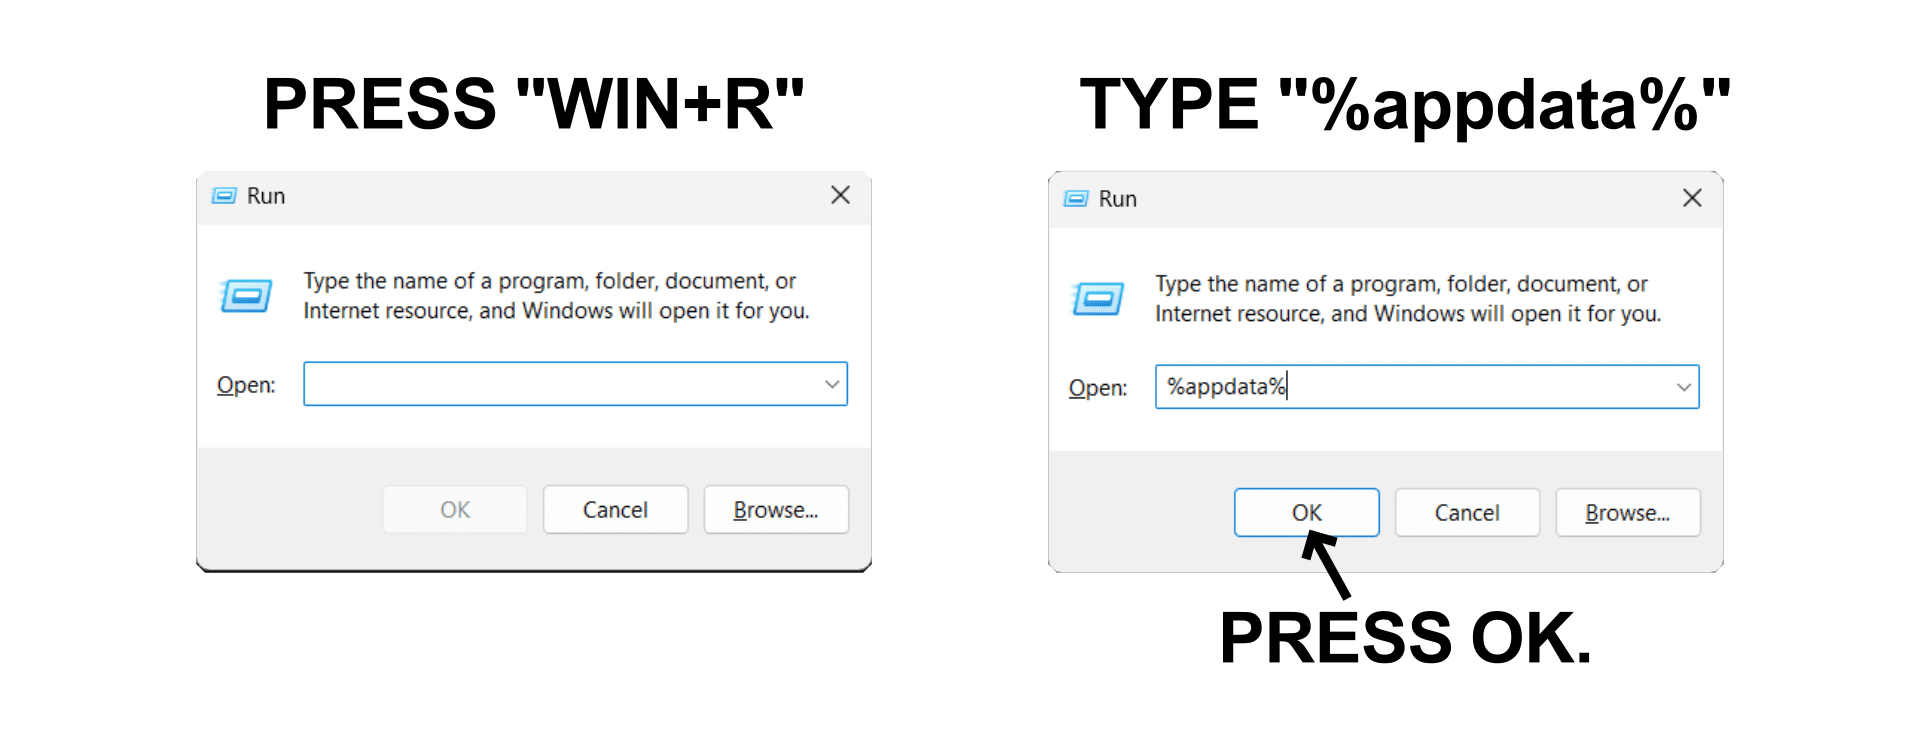
- Press the key combination “Window+R” to Open the Run command window.
- Insert “%appdata%” and then press “Enter” to open The “Roaming folder”.
- You should see a folder named “minecraft.”. If you see a folder named “mods”, simply open it.
- If you don’t see a mods folder inside the .minecraft folder, you need not worry. You just have to create a new folder yourself. Right-click in the folder, choose “New” -> “Folder”, rename the folder to “mods” and you are done!
- Once you open your mods folder, you can drag-and-drop or copy-paste your downloaded mod file here.

- Open directly from the game
- Open the Minecraft launcher and choose to start the game with the “NeoForge version”
At the Minecraft main menu, click on the “Mods” button. Then choose “Open mods folder” given at the bottom left corner, the “mods” folder will open.
Step 4: Install and activate the Mod File
- Now that you have opened the “mods” folder, simply place the mod file you have downloaded in step 2 into this folder.
- To activate the mod, click on the “Mods” button on the main menu. Inside “Mods”, you will see a list of the mod files that are ready to be used, simply click on the name of the pack you want to install. When the name of the chosen mod is in bold, it means that you have successfully activated it.
- Go back to the game and enjoy!
You May Also Like


This post has no comments yet. Be the first — your comment will appear here.