Chat Macros Mod
Well, Chat Macros Mod is a mod that allows you to put in codes into the chat and have them be parsed into something, you can define that something in the configuration file, but what’s so good about it is that you can get variables into the parsing, so typing in, for example, xpos will put in the chat your X coord, the list of keywords can be found in the information section.

It also adds in a quick fix that makes the chat pane not instantly close when you finish typing (this can be changed).
Using chat macros is easy, in your chat pane you’ll see a display telling you if they’re enabled or not, you can enable/disabling them by pressing ALT inside the chat pane, you can also change how the window reacts to you pressing ENTER by pressing RCONTROL inside the chat pane, that gets displayed next to the macro display.
For simplicity sake, cfg = Config File.
In the cfg, you’ll find two characters, the macro start character (default to {), and the macro finish character (default to }), these control what characters your message has to start and end with in order to be considered a macro, so, with the default config:
“hi {macro}” isn’t considered a macro;
“{macro} hi” isn’t considered a macro;
“{macro” isn’t considered a macro;
“{macro}” is considered a macro.
In the cfg you’ll find a section to put your own macros, you can really put them anywhere, but it’s better to put them there so you can find them easier, here’s an example macro:
macro » This is an example macro.
So, with this macro, if you type in {macro} you’ll send “This is an example macro.” and the rest of the server will see it like this.
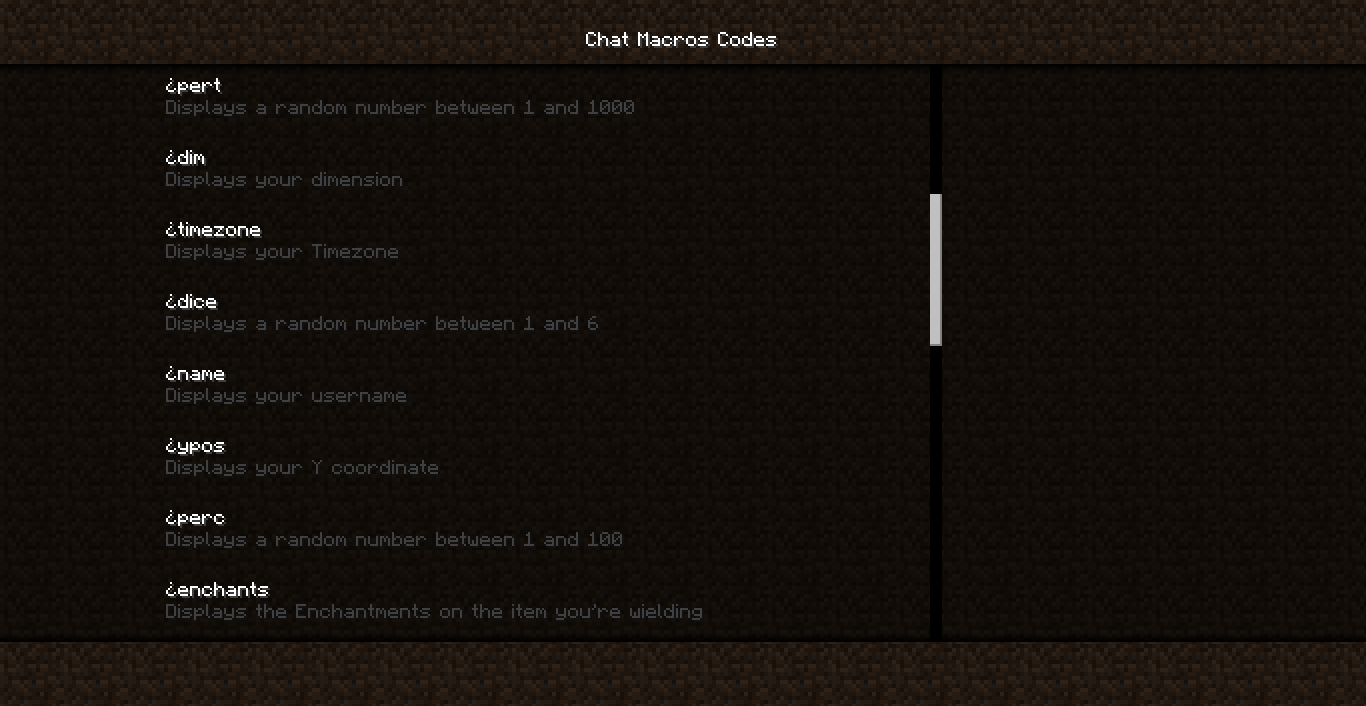
There’s also variable codes, that get a specific thing in the game and add it to the chat, these are indicated with the ¿ character, so as they don’t interfere with your everyday chat, here’s the list of variable codes:
(Note, you can also see the codes in-game).
Spoiler:
- ¿xpos : Displays your X coordinate;
- ¿ypos : Displays your Y coordinate;
- ¿zpos : Displays your Z coordinate;
- ¿perd : Displays a random number between 1 and 100;
- ¿pert : Displays a random number between 1 and 1000;
- ¿dice : Displays a random number between 1 and 6;
- ¿dim : Displays your dimension;
- ¿armor : Displays your armor level;
- ¿food : Displays your food level;
- ¿hp : Displays your health;
- ¿fps : Displays your framerate;
- ¿ping : Displays your ping with the server;
- ¿names : Displays the names of all the players on the server;
- ¿name : Displays your username;
- ¿lvl : Displays your level;
- ¿item : Displays the item you’re wielding;
- ¿block : Displays the block you are standing on;
- ¿players : Displays the amount of players on the server;
- ¿prand : Displays the username of a random player on the server;
- ¿score : Displays your score (The one that gets shown when you die);
- ¿sysdate : Displays the System Date;
- ¿systime : Displays the System Time;
- ¿timezone : Displays your Timezone;
- ¿tex : Displays the name of the Texture Pack you’re using;
- ¿enchants : Displays the Enchantments on the item you’re wielding;
- ¿java : Displays your java version;
- ¿os : Displays your Operating System;
- ¿mods : Displays the amount of mods you have loaded;
- ¿count : Displays the amount of macros you have;
- ¿potions: Displays the active potion effects on you and their times.
So, if you were to make this macro:
layer » I'm at layer ¿ypos.
And in-game you typed in {layer}, and you were in Y coordinate 12, you’ll send “I’m at layer 12.”.
Typing ¶ in the macro will split the message in various messages at that point, keep that in mind when making long macros.
The {macros} macro is prebuilt, and will send a list of your macros, this is client-sided so you don’t have to worry about spamming the server chat.
The {reload} macro, that is prebuilt as well will reload the macro file so you don’t have to close minecraft to change the macros.
The {add} macro, that is also prebuilt, when used will open a GUI inside the chat GUI that will allow you to add macros in-game, it also opens up some buttons, one of them opens up a GUI where you can see the chat codes in-game.
The {help} macro, yet another prebuilt will allows you to see what a macro does, so for example, let’s take in consideration the layer macro from earlier, if you typed in {help’layer’} you’d receive this message: “layer » I’m at layer ¿ypos.”, this is also client-sided.
Chat Macros Mod Screenshots:

The Configuration file for this mod is located in /.minecraft/vazkii/config/chatmacros.cfg, it will only be there after you installed the mod(and Vazcore) and ran the game at least once.
Requirement:
Installation:
Installing Forge:
- Open your Minecraft launcher.
- Open the “Options” menu near the “login” button
- Use the link in the Options menu to open the .minecraft directory
- Navigate to the bin folder.
- Open minecraft.jar and the Forge version you downloaded with appropriate archive software. (i.e WinRAR, 7-Zip)
- Drag all contents from Forge into the minecraft.jar
- Delete the META-INF folder from the minecraft.jar
- Close both minecraft.jar and Forge download.
- Go back to the .minecraft directory.
Installing VazCore:
- While inside the .minecraft directory, create a new folder titled “mods”, assuming there isn’t one already.
- Drag and drop the entire VazCore .zip file into the mods folder. (Do not extract the contents of the .zip)
Installing Chat Macros Mod:
- Drag and drop Chat Macros Mod.zip file into the mods folder. (Do not extract the contents of the .zip