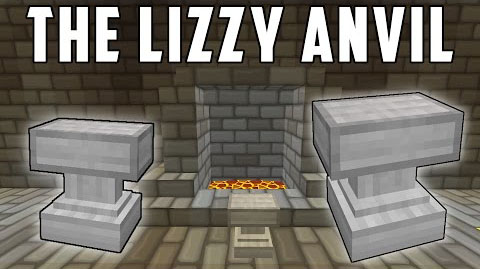
The Lizzy Anvil Mod 1.8.9
The Lizzy Anvil Mod 1.8.9 adds a new anvil to Minecraft: the workshop anvil (a.k.a. The Lizzy Anvil). The workshop anvil replaces the vanilla anvil for the purpose of renaming, repairing, and enchanting with books. The vanilla anvil still exists in the game but it no longer does anything but look nice and fall on things.
The Lizzy Anvil Mod Features:
Cost Mechanics: Each enchantment has a cost-per-level value. The enchantment value is the cost-per-level times the level of the enchantment. When you enchant an item with a book on the workshop anvil it costs the enchantment value. When you repair an item, the cost is the total enchantment value for all the enchantments on that item. If there are no enchantments, there is no cost. The cost never goes up unless you add enchantment value to the item. When you combine two enchanted books together the cost is the lower of the two enchantment values on the books. When you combine two enchanted items together the cost is the value of the enchantments on the resulting item. Enchanting items with books and combining books together are considerably less expensive than combining enchanted items together. Renaming items never has a cost, even if the item is enchanted.
The costs for enchantments are based on the vanilla values with adjustments to make them fit this mod’s repair system. They are also adjusted individually to fit my perception of actual in-game value. They represent a fair cost system overall, but your perception of actual in-game value may differ. You may also want repairing to require more or less grinding. With this in mind I have made the costs individually configurable. You can change them to whatever you like (see configuration options).
Cost Limit: The cost can never be “Too Expensive!”. If you prefer a cost limit, you can set one (see configuration options). The impact of increasing the costs with a cost limit in place, or having a cost limit lower than the vanilla value, is that you will have a limit on how many enchantments can go on an item. The level cap will serve as a limitation on how powerful enchanted items can be. Keep this in mind if you configure the enchantment costs yourself or use a cost limit lower than 40 (the vanilla value).
Anvil Breaking: Anvils don’t break! But then, you also can’t really stack 64 anvils and carry them around either.
Repair Bonus: The repair bonus was raised from 12% to 24%. This tends to save you just under an ingot for pickaxes and a bit more for the various armours. You can change this value to whatever you want (see configuration options).
Material Cost: The material cost is the amount of materials (iron ingots, diamonds, leather, etc.) it takes to repair an item. On the vanilla anvil this was 4 for all items. On the workshop anvil it is based on the amount of materials used to make the item in the first place, with a bonus per material used based on the repair bonus.
Expanded Repairable Items: All items that are damageable can be repaired using materials. This adds the following items to the list of repairable items.
New Repairable Items – (repair material):
- Hoe – (the material it is made of)
- Shears – (Iron Ingots)
- Bow – (String)
- Flint and Steel – (Flint)
- Fishing Rod – (String)
- Carrot on a Stick – (a new Carrot)
Unenchanting: Place an enchanted item in the workshop anvil with a piece of redstone and you can remove all enchantments on that item for a cost of 1 “level”. If you want to remove only one enchantment you can rename a piece of redstone to the name of the enchantment you want to remove (without the level numerals, case is ignored) and it will only remove that enchantment. This costs 1 “level” also. If the name does not match an enchantment on the item it will not do anything. To unenchant an item completely, the redstone must be unnamed*. If you would like the unenchant item to be something other than redstone, you can set it to the item ID of your choice (see configuration options). The usefulness of this feature is limited, but there are some cases where it can come in handy, such as when dealing with mutually exclusive enchantments.
Transferring Enchantments: Place an enchanted item in the workshop anvil with a normal book and you can transfer the enchantments on the item to the book. This costs the total cost of the enchantment(s) transferred. If you want to transfer only one enchantment you can rename a book to the name of the enchantment you want to transfer (without the level numerals, case is ignored) and it will only transfer that enchantment. If the name does not match an enchantment on the item it will not do anything. To transfer all enchantments the book must be unnamed*. The enchanted item and any enchantments not transferred will be destroyed in the process. As with unenchanting, this feature has limited usefulness, but there are a few cases where it’ll be exactly what you want to do.
*Unnamed items have no ‘custom name’. If an item has a custom name, the displayed name is italicized. To remove a custom name, put your item in the left anvil slot, delete all the characters from the text field, then pick the item up from the output slot. The item will now be unnamed.
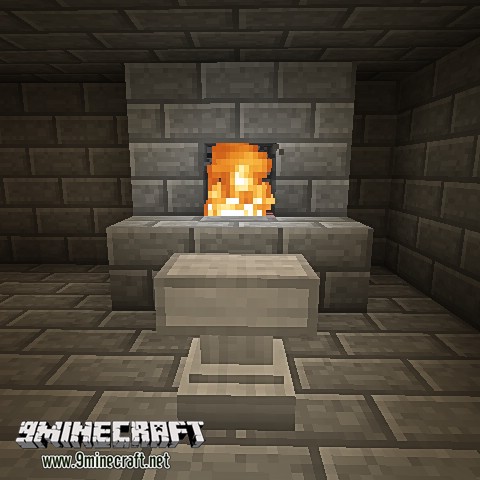
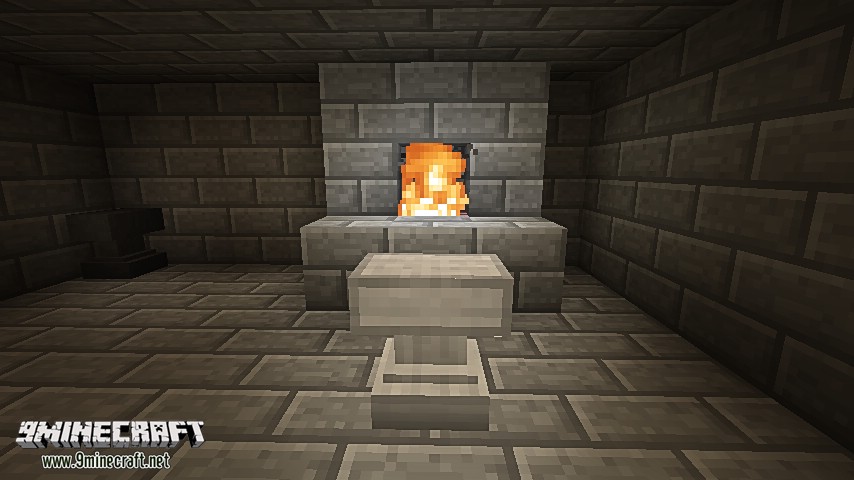
Heat Source Requirement: The workshop anvil (optionally) requires a heat source within 3 blocks for you to be able to repair or enchant items on it. This is intended to make the anvil require a forge for full functionality like the enchanting table requires a library. The heat source can be fire or lava, and there must be a clear path between the anvil and the heat source. You do not need a heat source to rename items or to work exclusively with books, only to work with damageable items. Enchanting a damageable item with a book does require a heat source. Again, this feature can be easily turned off if you don’t like it (see configuration options).
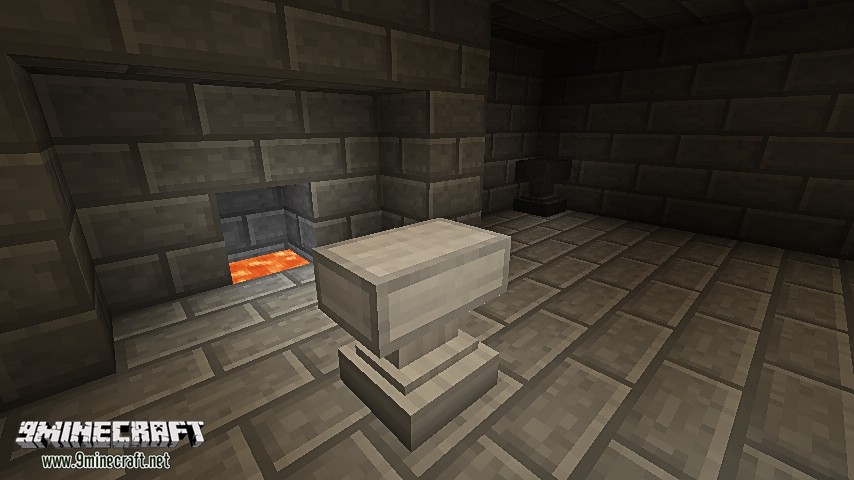
Heat Source Placement: The image below shows the range of blocks that a heat source must be in to provide heat for the workshop anvil. This is 3 blocks in “taxicab” distance. Lava must be on the same level (y coordinate) as the anvil or one level lower. Fire must be on the same level as the anvil or one level higher.

There must be a clear path to the heat source (nothing solid in the way). The idea is that you need to heat up your tool/weapon/armour to work with it and need easy access to the heat source from the anvil. Most blocks that are not full blocks, such as torches, redstone wires, slabs, etc., won’t block access to the heat, but all full, solid blocks, and a few blocks that are nearly full blocks, like stairs, will. Glass and fences do block access to the heat source. You’ll have to try other blocks to see if they block access or not. Some things that block or do not block access may be illogical.
In order to check whether a heat source is accessible from the anvil, place a damageable item in the left slot of the anvil inventory and any item in the right slot. If the heat source is not accessible you will see the message, “No Heat Source!”. If you have set the configuration options to not require a heat source you will never see this message.
The Lizzy Anvil Mod Screenshots:
The Lizzy Anvil Mod Recipes:
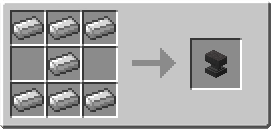
The Plain Anvil (Vanilla Anvil): The vanilla anvil still exists in the game as the Plain Anvil. However, it no longer has a repair inventory. It also has a new, less expensive, crafting recipe. Otherwise, the plain anvil behaves exactly as the vanilla anvil does (it is the vanilla anvil): when it falls it has a chance of being damaged and when it falls on certain types of blocks, like torches and redstone circuits, it destroys those blocks.
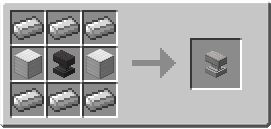
The Workshop Anvil (Lizzy Anvil): The workshop anvil is what you use to rename, repair and enchant items on. It has the same inventory gui as the vanilla anvil and can do all the same things, and more. Only the costs and limitations are different. It also behaves a bit differently as a falling block.
The total iron used to make a workshop anvil is the same as in the original vanilla anvil recipe (31 ingots).
As a falling block, the workshop anvil behaves differently from the vanilla anvil in a few minor ways (one reason I left the vanilla anvil in the game). When the workshop anvil is dropped on circuits or torches it does not break them. Instead, it drops itself as an item. Also, the workshop anvil is never damaged when it falls. The ‘damage type’ of the workshop anvil is different as well. This probably only affects death messages (i.e. ” was squashed by a falling anvil”). So, plain (vanilla) anvils are for dropping on heads and workshop anvils are for working on.
How to install The Lizzy Anvil Mod 1.8.9
- Download and install Minecraft Forge.
- Download The Lizzy Anvil mod.
- Go to .minecraft/mods folder.
- If the “mods” folder does not exist you can create one.
- Drag and drop the downloaded jar (zip) file into that.
- Enjoy the mod.
Download Links for The Lizzy Anvil Mod 1.8.9
For Minecraft 1.8.9