How To Download & Install Minecraft Snapshots
 27,077
 2
2


How To Download & Install Minecraft Snapshots tutorial aims to help players understand the best way to successfully install and try out the game’s latest pre-release versions. Essentially, Snapshots are testing installations that let players explore and discover new features in the new versions of Minecraft before they are officially released. As interesting as they seem to be, snapshots are not always stable to use, so you would want to create backup worlds or create new worlds to try them out. Let’s begin!
Quick Tutorial:
1. Access the Snapshot download page.
2. Download the Snapshot you want to install.
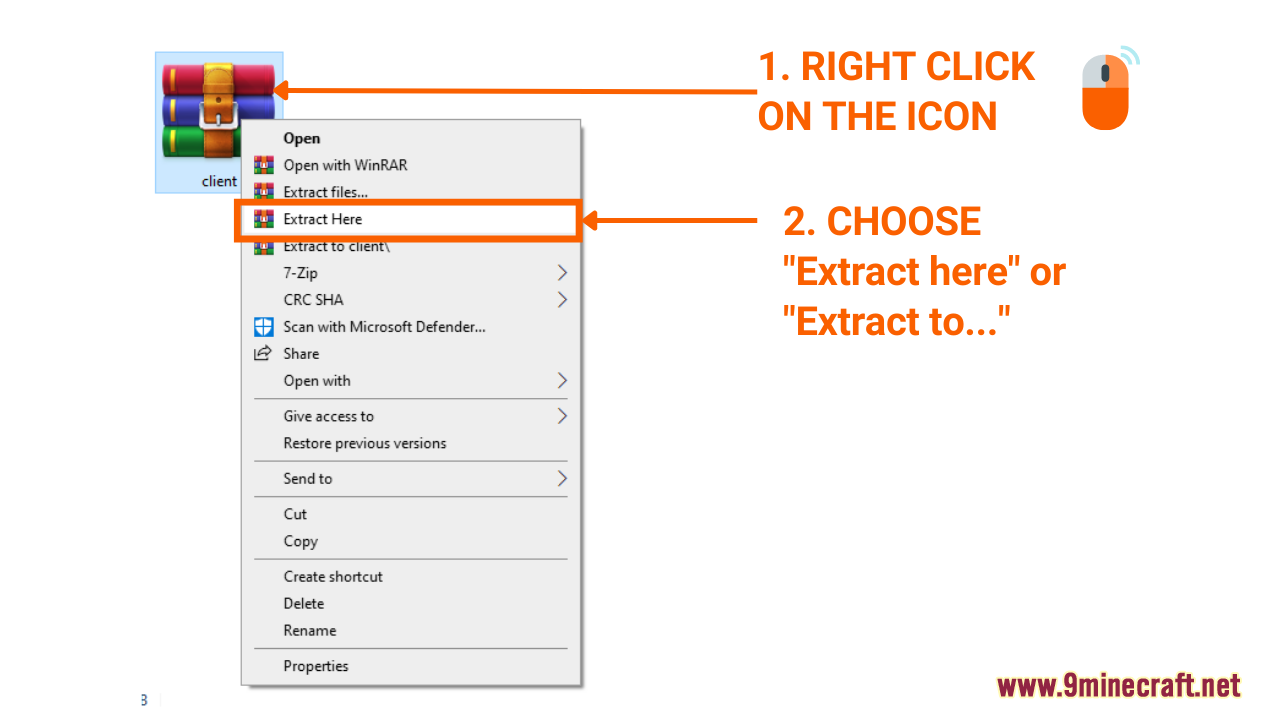
3. Extract the Snapshot file.
4. Press “Window+R” to open the Run command window, type “%appdata%” then press “Enter” to open The “Roaming folder”.
5. Inside the “.minecraft” folder, you should see a folder named “versions”, place the extracted snapshot file into this folder.
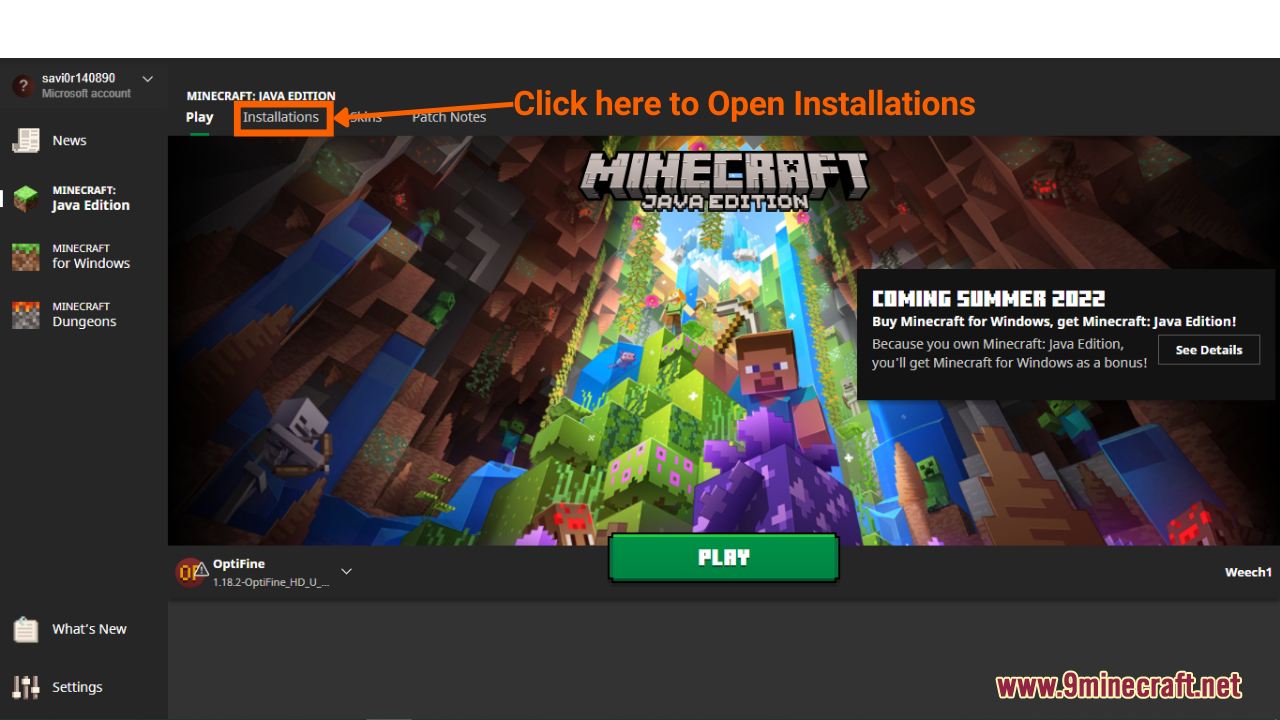
6. Once the launcher is open, navigate and open the “Installations” tab.
7. Choose “New Installation”, set a name for this installation then choose the snapshot version you wish to play and click create.
8. Go back to the “Play” tab, you can see the installation with the snapshot version you have chosen. Choose this version and click play to start the game with it.
Detailed Tutorial:
Step 1: Access the Snapshot download page
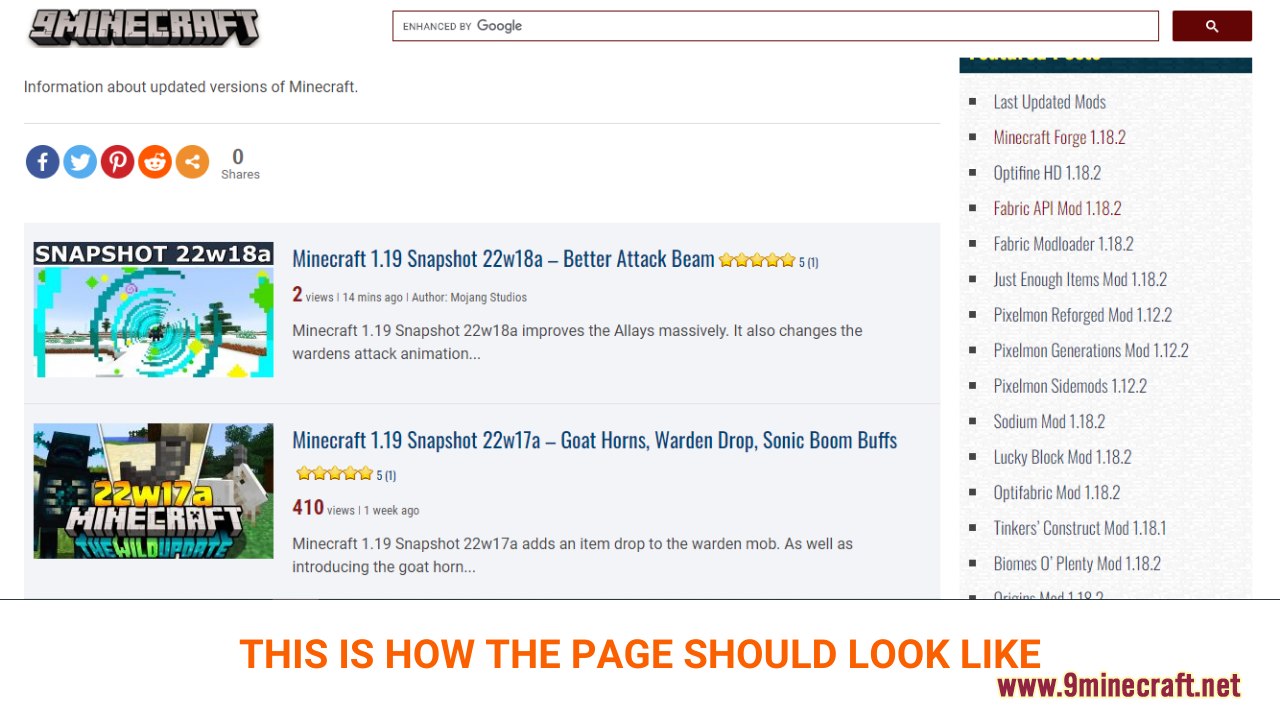
- Before the official release of each new version, Mojang has published a lot of Snapshots for players to try out. To find and download any of these versions, simply click on the following link. On this page, you can see the review and download links of all the latest snapshots out there: tps://www.9minecraft.net/category/minecraft-versions/
Step 2: Download the Snapshot you want to install
- As you scroll down the page, you should see a list of the latest snapshots. Each post will contain example pictures and the main features of a specific snapshot.
- After deciding on the snapshot you want to install, click on the download link at the bottom of the post to download. Please note that you must choose the client option to use the Snapshot in Singleplayer worlds.

Step 3: Install the Snapshot
- Now that you have downloaded your favorite snapshot file, you will have to extract it to get its final file.
- After receiving the extracted file, it’s time to put it in the correct folder in “.minecraft”. It should be placed inside a folder named “versions” within “.minecraft” folder.
Here is how you can do it:
- Press the key combination “Window+R” to Open the Run command window
- Insert “%appdata%” and then press “Enter” to open The “Roaming folder”
- Now open the folder named “.minecraft”, you should see a subfolder named “versions” in it.

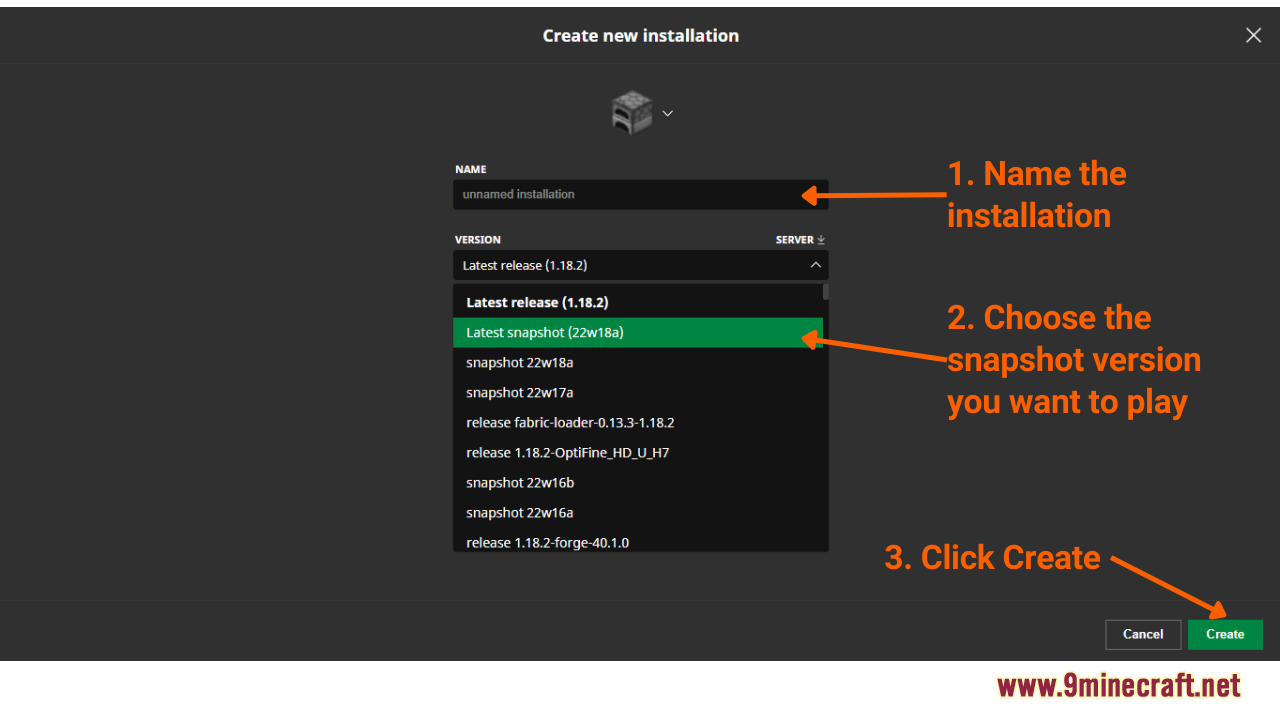
Step 4: Add a new installation to your Minecraft Launcher
- Once the launcher is open, navigate and open the “Installations” tab.
- Make sure the “snapshot” box is ticked, and choose “New Installation” to proceed
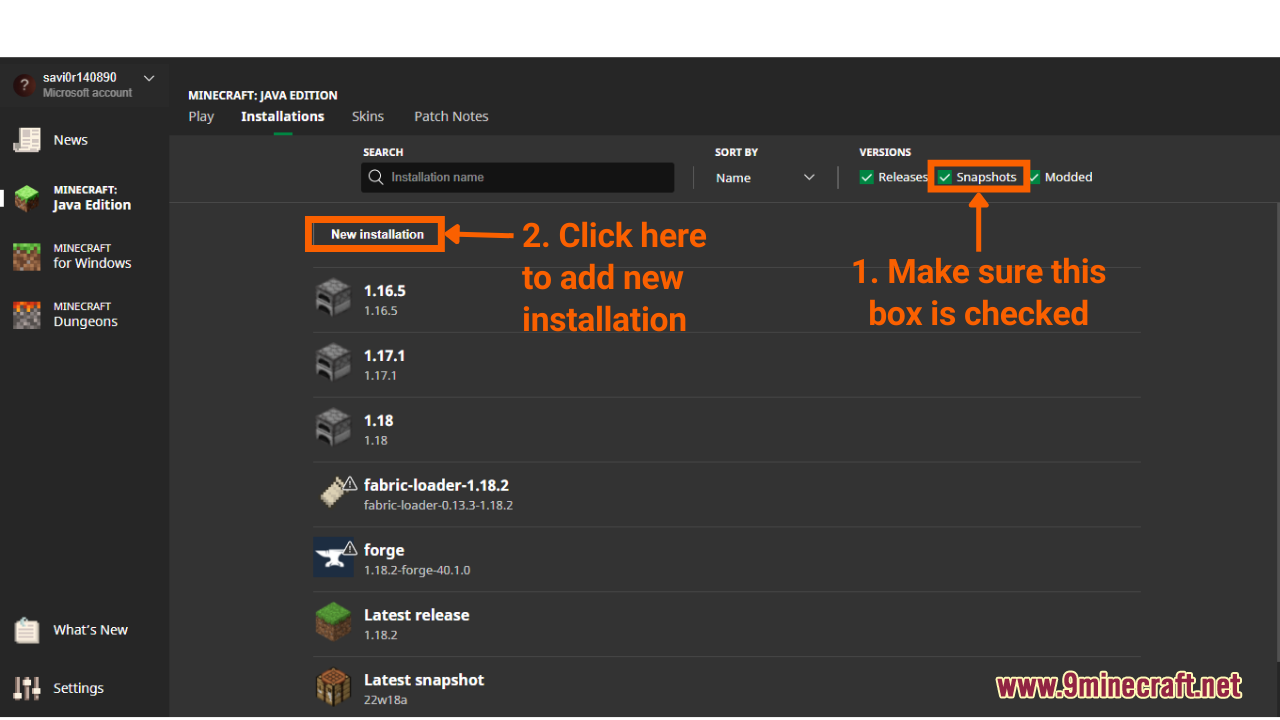
- When this window pops up, simply set a name for this installation, choose the snapshot version you wish to play and click create.
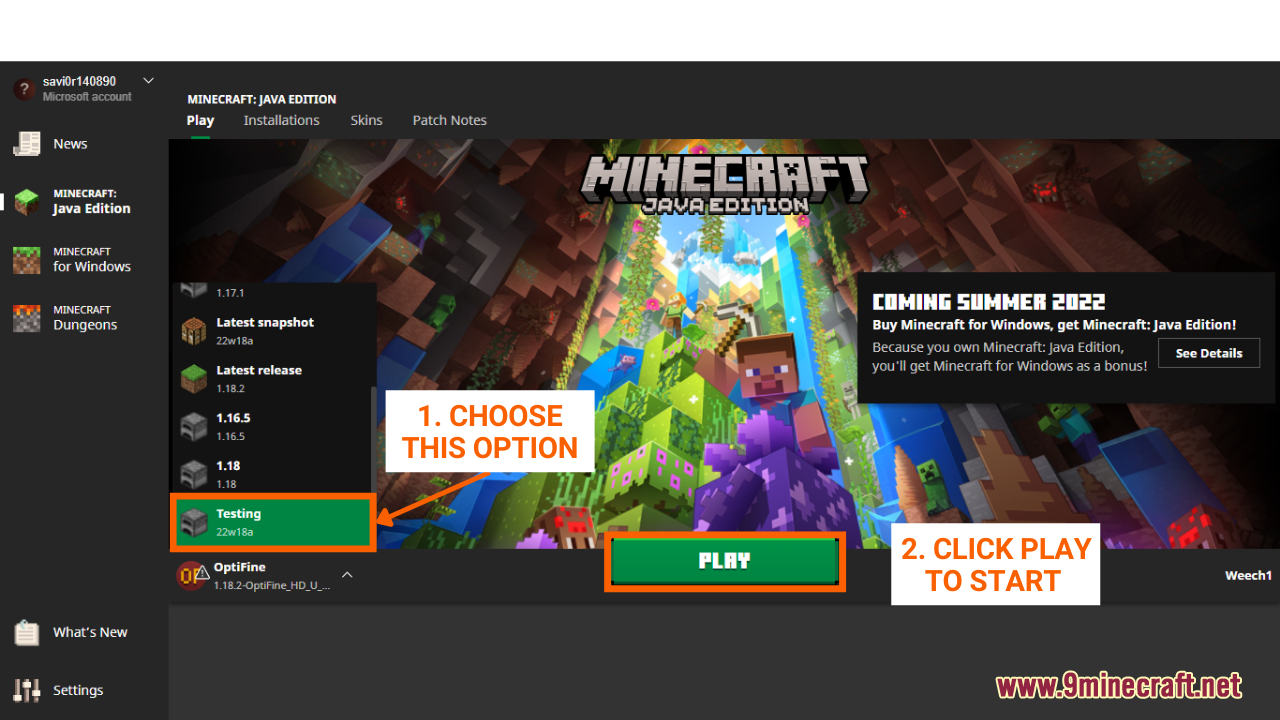
Step 5: Start the game with the snapshot
- A new installation should be created by now, when you go back to the Play tab, you can see the installation with the snapshot version you have chosen. Choose this version and click play to start the game with it.

2 Comments
What do you think?
Your opinion means a lot - we'd love to hear from you.
You May Also Like


I like this game
Quero abaixar Minecraft