Enhanced Portals 3 Mod
 1,013
1,013
 0
0
 August 8, 2016
What is Enhanced Portals 3 Mod?
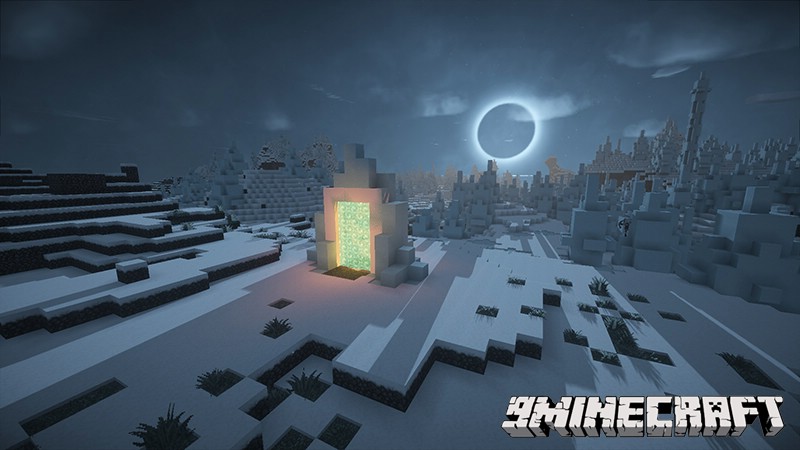
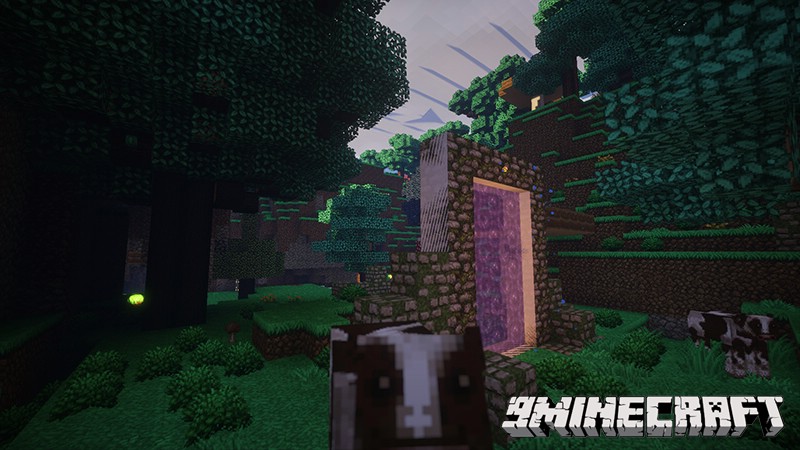
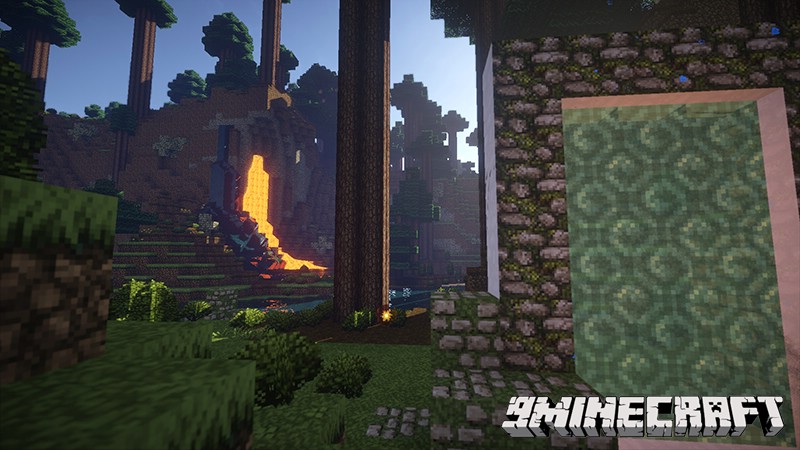
Enhanced Portals 3 Mod brings a richer experience than the vanilla obsidian frames. Transport players, mobs, animals, items, fluids, even energy to anywhere, whether it be 10,000m away, in the Nether, the Twilight Forest, or any other dimension. Link them together on a network or use them to dial other portals. Use them on your server as thresholds to other worlds or biomes. You can even design complex creations to help with other projects, like a spawner room or minecart system. The portals you design don’t even need to be in the shape of a rectangle, make them any shape you want to, as long as it’s a closed, flat area.
Enhanced Portals 3 Mod Screenshots:

Show More
Enhanced Portals 3 Mod Spotlight:
Enhanced Portals 3 Mod Wiki:
https://github.com/SkyNetAB/enhanced-portals/wiki/Getting-Started
Enhanced Portals 3 Mod Recipes:
Blocks
Show More
Portal Frame
This is the main boring portal frame. Does nothing special.
Portal Controller
This is the main block for your Portal structures. It is the block that does most of the portal’s logic, and stores all of the data. You can remove, replace or add more portal parts onto the portal structure, but as long as the Portal Controller doesn’t get broken, all of it’s data will stay intact.
Redstone Interface
Ever wanted your portals to interact with Redstone? This is the block to do it. Activating this block with a Wrench in your hand will open up it’s GUI. It has two main options, Input and Output. The Input mode is all about receiving redstone signals and interacting with it. The output mode is used for emitting redstone signals based on portal events (Portal Created, etc).
Input
- Create portal on signal (Note: Only works on portals with Network Identifiers)
- Remove portal on signal
- Create portal on pulse (Note: Only works on portals with Network Identifiers)
- Remove portal on pulse
- Dial specific identifier (Note: Only works on portals with Dialling Devices. Will dial the identifier in the Dialler’s list corresponding to the strength of the signal (Sending a signal of strength 1 will dial the first entry in it’s list))
- Dial specific identifier (2) (Same as above, but will terminate the connection when a redstone signal is no longer being received)
- Dial random identifier (Note: Only works on portals with Network Identifiers. Will dial a random identifier in it’s list)
- Dial random identifier (2) (Same as above, but will terminate the connection when a redstone signal is no longer being received)
Output
- Portal Created
- Portal Removed
- Portal Active (Continuously emits while the portal is active)
- Portal Inactive (Continuously emits while the portal is inactive)
- Entity Touch Portal (Emits when any entity first touches the portal)
- Player Touch Portal (Same as above, but for players only)
- Animal Touch Portal (Same as above, but for animals only)
- Monster Touch Portal (Same as above, but for monsters only)
Network Interface
The Network Interface is the basic form of networking two or more portals together. By setting a network identifier in it’s GUI, it will connect to all the portals linked up to the same network identifier. By using a Redstone Interface and setting it to create a portal, it will create a portal to the next portal in the network list (defined by the order in which you add them)
Dialling Device
The Dialling Device is an upgraded version of the Network Interface. Instead of connecting to networks, it is able to connect to other portals directly by dialling their unique Portal ID. You can also save portal IDs into a list from which you can easily select and dial to in the future.
In addition, it also has the ability to customize the portal, frame and particle texture based on which portal it is dialling. It will also turn the receiving portal’s textures into the same texture. When the connection is terminated, both portals will return to their original textures.
Biometric Identifier
This block allows you to filter out which entities you would like to be able to use your portals. There are a few different modes and you can set up two different permission lists, one for entities being sent from this portal, and one for entities being received by this portal.
Modes
0 – Match name
This filter mode will just match the entity’s name. For example, “Pig”, or the player’s name. This will also grab the name of the entity if it has been renamed via a Name Tag. An example of this would be to only let in something called “Porky”, and reject everything else.
1 – Match type
This filter mode will match the type of the entity. For example, “Pig” would match all pigs regardless of their name. You can also configure this to look for the generic type of the entity, for example Player, Animal or Monster.
2 – Match name and type
This filter will match the name and the type of the entity. This should be used if you want to create a “secret” portal that only you can access. If you used mode 0 (Match Name), no player would be allowed in, although they could rename creepers, pigs, or other entities and push them through. Using the above examples, only a Pig called “Porky” would be allowed through.
Module Manipulator
This is a fairly boring block. All portal modules (upgrades) go in here, stores a maximum of 9 at a time.
Dimensional Bridge Stabilizer
The Dimensional Bridge Stabilizer (DBS) is the big multiblock structure that does all the heavily lifting of managing each and every portal connection, and it’s also what is responsible for creating the portals.
When constructing the DBS, it must be at least 2 wide by 3 long by 2 high. It can go up to 2x3x256, with each row adding to the maximum amount of active portal connections, and the amount of energy it can store. When you are connecting portals to the DBS, make sure that you are connecting both portals to the same DBS. If two portals are on two seperate DBS’, then they cannot connect to each other.
The DBS is responsible for draining energy to maintain the portal connections, each second the DBS will query it’s internal storage to see if it can get the full amount requested (as shown in it’s GUI). If it can’t get that power, it tries again but at 80% capacity. If that fails, it tries at 50%, and then 30%. Now, why would you need to keep giving it all the power it requests if it works just fine on 30% power? Instability. Creating a stable wormhole between two points is a costly, and dangerous, task. If it can’t get the required power then it may close, though it’s likely that it will stay open, unless you’re giving it a small amount of power (less than 30% of what it requires.)
There are three different tiers of instability. The first tier will give you a debuff and have one of three minor annoying effects, but they have low chance of happening. The second tier will have two annoying effects, with an average chance of them happing. The third and final tier will only have one effect. It will be painful if you’re not prepared for it. You’ll be sent to a place called The Crimson. What lurks there? Who knows.
You can also force the DBS to use less power for a trade-off with instability, for the crazy ones out there.
Decoration
There are also a few decorative blocks, which (currently) is just the Portal Frame and DBS textures, without the Tile Entities. They also have Connected Textures, though they will not connect with the real portal frames/DBS
Items
Show More
Wrench
The wrench allows you to open all the GUIs of every block (that has one). It is also used to reconfigure a portal after you have broken a portal part, or added a new portal part onto an existing portal structure.
The only GUI that can be opened without any special tool, is the Dialling Device.
Glasses
The Glasses allow you to see the difference between all of your portal frames. It will overlay an icon ontop of the frame, to allow you to distinguish what frame does what. The only exception to this, is the Dialling Device, which can be seen without the glasses.
Nanobrush
You can use any type of stick or wool for this.
The Nanobrush is what does all of the portal customization. You can right click on any active portal part to open up the customization screen. There are a few shortcuts to getting to a specific tab, however. If you activate a portal frame, the GUI will open up on the frame customization tab. If you activate the portal, it will open up on the portal tab. If you sneak-activate the portal, it will open up onto the Particles tab.
Note that when you are changing colours with the tab on the right – you will need to click Save before you close the GUI or go onto something else, or your changes will be lost.
In addition to changing the colours, you can also use the Facade slot and the Custom Icon slot. Facades allow you to change the portal or portal frame texture into any block or fluid. Simply put a block or fluid container into the slot and it will take it’s texture. However, if you have a Custom Icon set, the Custom Icon will take priority.
Custom Icons allow you to include new textures for your portals and portal frames. Double click on an icon to select it. Double click it again to deselect. You can also right-click anywhere on the icon selection area to deselect any selected icon.
You can add more custom icons by creating textures and storing them in a resource pack, using the following directory structures.
For frames put your textures into: assets/enhancedportals/textures/blocks/customFrame/
And for portals they go here: assets/enhancedportals/textures/blocks/customPortal/
All icons must be named 00.png and increment upwards. If there is a gap in the numbering, it will stop loading there and any textures after it will not be loaded. By default, the portal contains 15 default custom icons, named 00.png to 014.png.
Location Card
You can use any type of blue dye for this.
The Location Card stores the location of a Dimensional Bridge Stabilizer. Simply activate the DBS with the Location Card in your hand, and it will encode it’s information onto the card. Activate the portal controller with the (filled) Location Card to initialize the portal. If you move the DBS with portals still connected to it, you will need to re-link the controller to the new DBS. This will not lose any of it’s customizations.
Synchronizer
This is still a work in progress, though functionality wise it should work as intended. Simply establish a connection between two portals, and then right-click on the Dialling Device you wish to copy all the data from. The Dialling Devices will be synchronized and will have the same dialling lists, along with customizations.
Identification Card
These cards go into the Handheld Scanner and Biometric Identifier to store Entity data, to transfer them into the Biometric Identifier’s lists, where you can set up whether or not that entity is allowed through this portal
Handheld Scanner
The Handheld Scanner is still a WIP, but it should be fully functional. This requires RF to work, unless you have it turned off in the config. Right-clicking will open up it’s GUI, where you can put in some Identification Cards on the left. Left clicking on an entity will store it’s data onto a card, and output it on the right of the GUI. If you hold sneak while left-clicking the entity, you will get it’s generic type instead of it’s type. For example, left-clicking will a pig will store it’s name, “Pig”, and it’s type, “Pig”. (Or “Porky” as it’s name, with the earlier examples) Sneak clicking it will save “Pig” (or “Porky”) and “Animal”. This allows you to set up filters for animals, monsters and players.
Sneak-right clicking will scan yourself.
Portal Modules
Portal modules are different upgrades for your portals, they are all self-explanatory. At the moment there are only 8 upgrades, meaning you can (pointlessly) have them all installed at once. Though I will be adding more in the future.
Enhanced Portals 3 Mod Modules
Blank Module
Particle Destroyer – Stops particles from being created
Rainbow Particles – Every particle has a random colour
Portal Silencer – Portal will no longer produce sound
Momentum – Entities keep their momentum. It will also correctly change their momentum based on the type of portal they enter into/exit from.
[No recipe, found in dungeon chests] Portal Cloaking – Makes the portal completely invisible while active
Particle Shader – Particles randomly spawn lighter or darker
[No recipe, found in dungeon chests] Ethereal Frame – Makes the portal frame transparent, allows you to walk through it and it glows but does not give off light
Featherfall – Fall damage will be negated when teleporting
Enhanced Portals 3 Mod Upgrades
These upgrades are for if you want to add special frame blocks into your portal without going through the hassle of breaking a frame block, replacing it, then activating the controller with the wrench. There is one for every special frame block, minus the portal controller.
Blank Upgrade
Redstone Interface
Network Interface
Dial Device
Module Manipulator
Enhanced Portals 3 Mod Energy
Show More
By default this mod requires another mod that can output Redstone Flux, from Thermal Expansion 3.
If you do not want/have TE3 or another mod installed, you can disable all energy requirements in the config file by setting I:PowerMultiplier to 0 in EnhancedPortals3.cfg.
Creating a Portal
Show More
Creating a valid portal isn’t that much different than what you’re used to. Simply create the portal out of the portal frame blocks, although there are some requirements when it comes to adding the special frame blocks.
If you want to create a portal using the Network Identifiers, then you will need a Portal Controller, Network Identifier and Redstone Interface as a minimum. However, if you’re planning on networking them via Dialling Devices, then you only need the Portal Controller and the Dialling Device.
The Portal Controller must be directly next to an air block where you want the portal to be created. You cannot reorientate it, and it does not need to be part of the frame.
Make sure you have your Dimensional Bridge Stabilizer set up (create a 2x3x2 multiblock structure) then hit it with a wrench. If it all went okay, you should be able to use the wrench again and open up it’s GUI. Don’t forget that this structure requires power! Also, portals can only connect to other portals that are using the same Dimensional Bridge Stabilizer. However, portals can connect to any DBS in any dimension or location.
Once you have your frame set up, get a Location Card and activate your Dimensional Bridge Stabilizer, then activate your portal controller. And you’re done, the only thing left to do it set up your customizations using the Nanobrush, or set up the Unique ID and Network ID (if applicable) to get it working. If you’re using a Network Interface, to create the portal, you will need to set the Redstone Interface into Input mode and have it set to one of the modes that creates a portal.
How to Install:
New to Minecraft? Follow our step-by-step guide to install Mods on your PC.View Guide
Download Links for Enhanced Portals 3 Mod:
For Minecraft 1.6.4
For Minecraft 1.7.2
For Minecraft 1.7.10
You May Also Like


This post has no comments yet. Be the first — your comment will appear here.