Minecraft Building Ideas: 30 Awesome Projects to Try in 2023 – Part 1
 6,924
6,924
 0
0


Minecraft is a game with pixelated graphics and a blocky world that attracts millions of players. It is a wonderful place where you can make your dreams come true.
There are many things that you can create in Minecraft, but some of them are more fun and useful than others. Here, you can add every detail and use your creativity to make new things in Minecraft.
You can visit this link to view all part here:
- Minecraft Building Ideas: 30 Awesome Projects to Try in 2023 – Part 1
- Minecraft Building Ideas: 30 Awesome Projects to Try in 2023 – Part 2
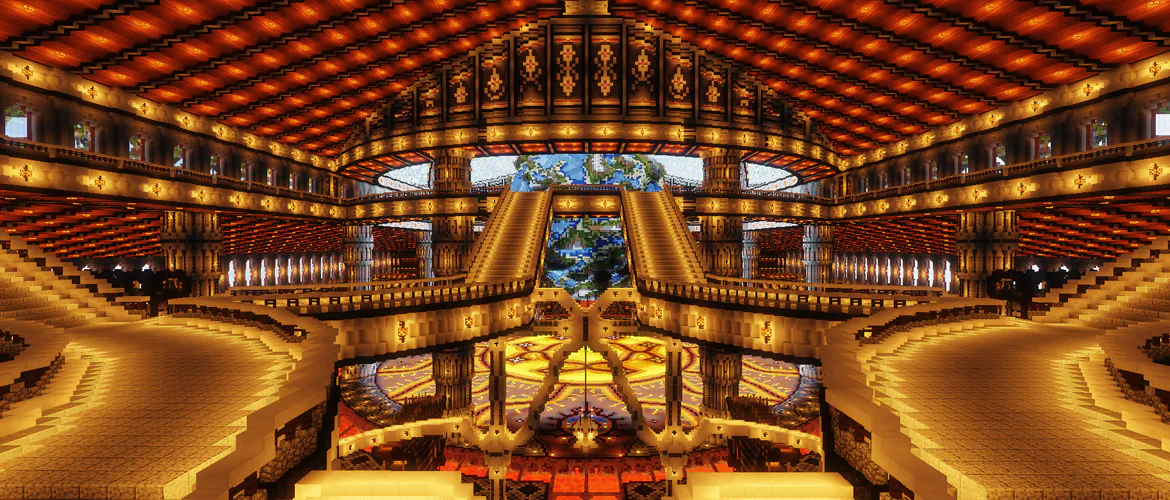
1. Mansion
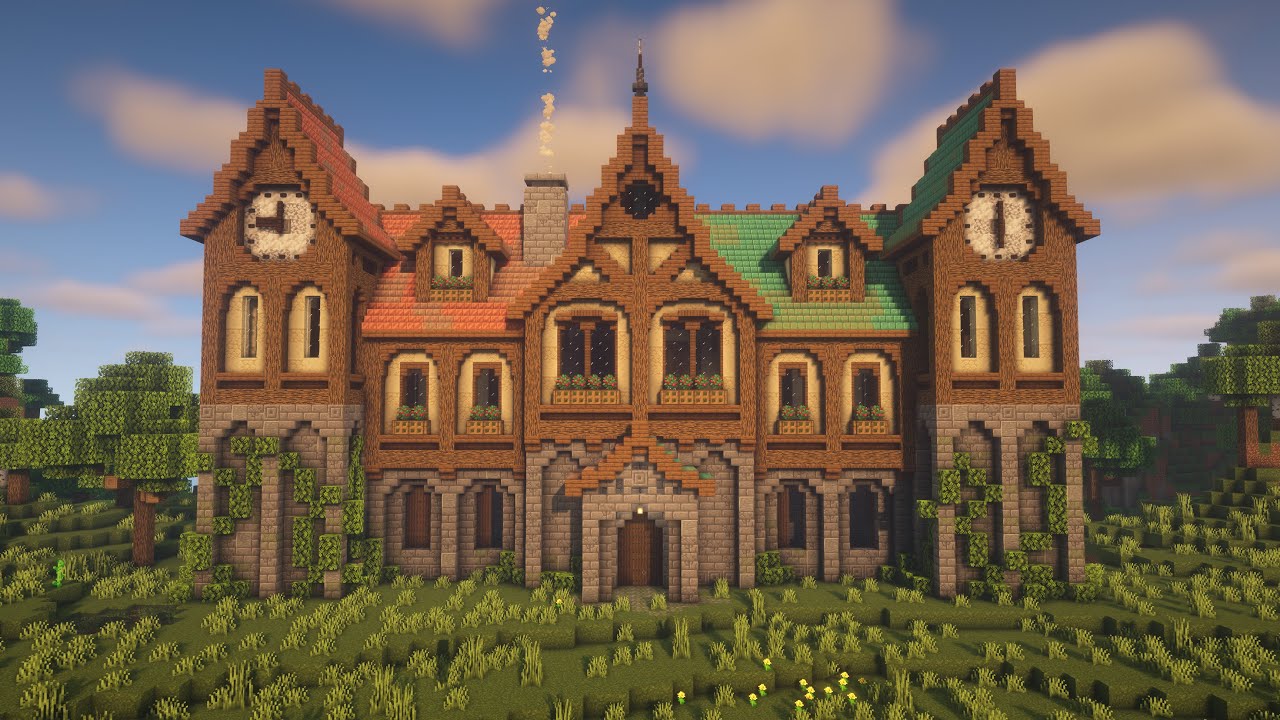
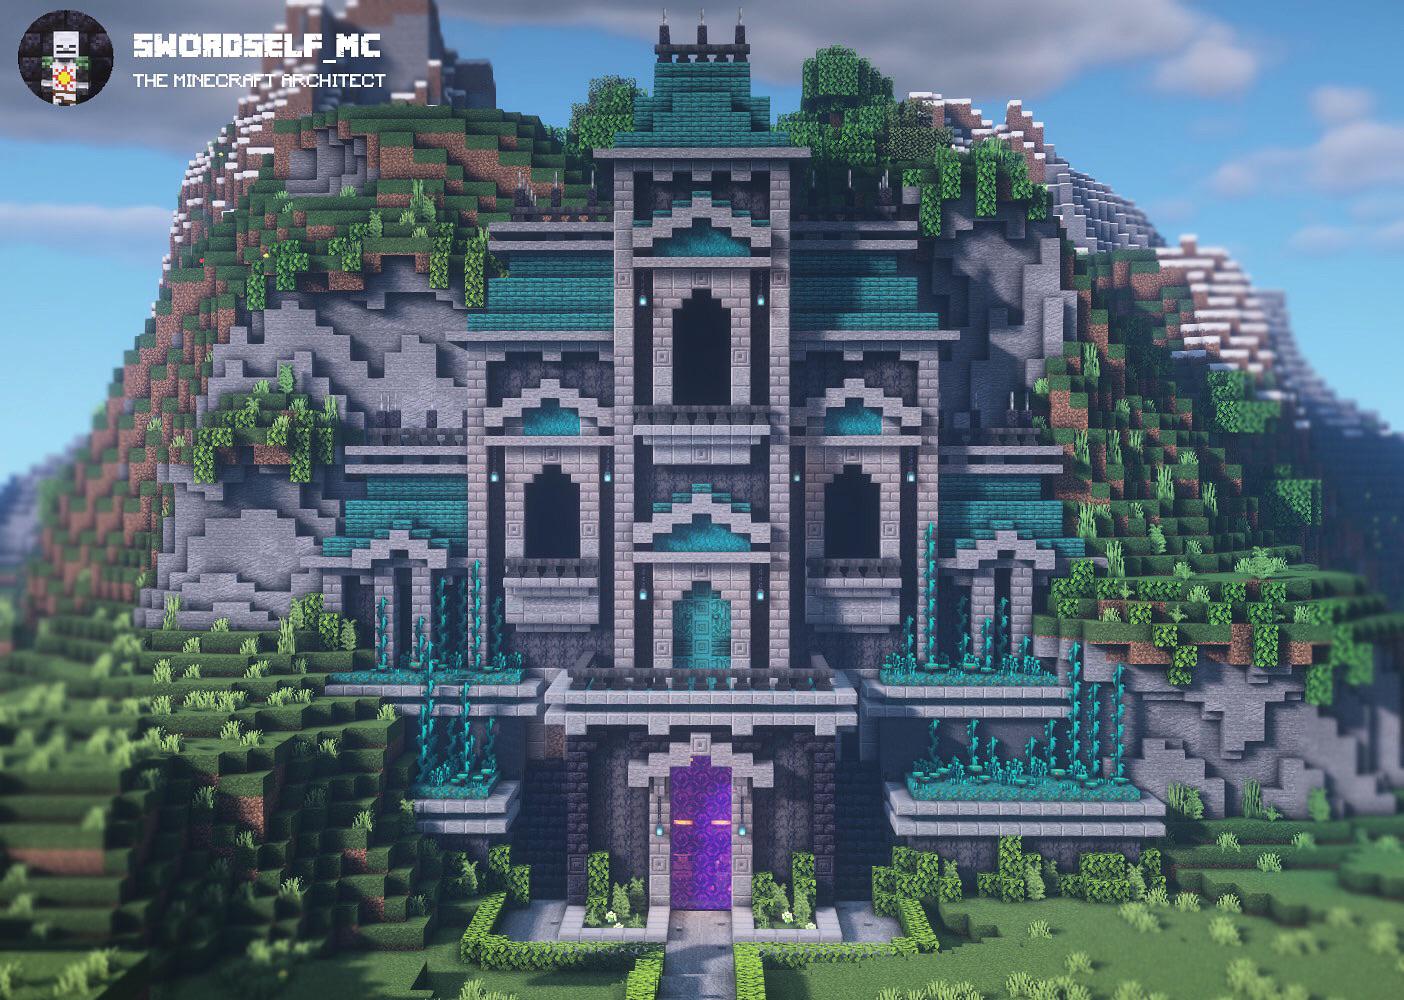
A mansion is a dream for many people, but in Minecraft, you can make it a reality. You can design and build your own mansion with every detail you want. You can create rooms with different themes, such as a library, a dining hall, or a secret chamber. You can also add loot chests to some of the rooms, which contain valuable items that you can use.
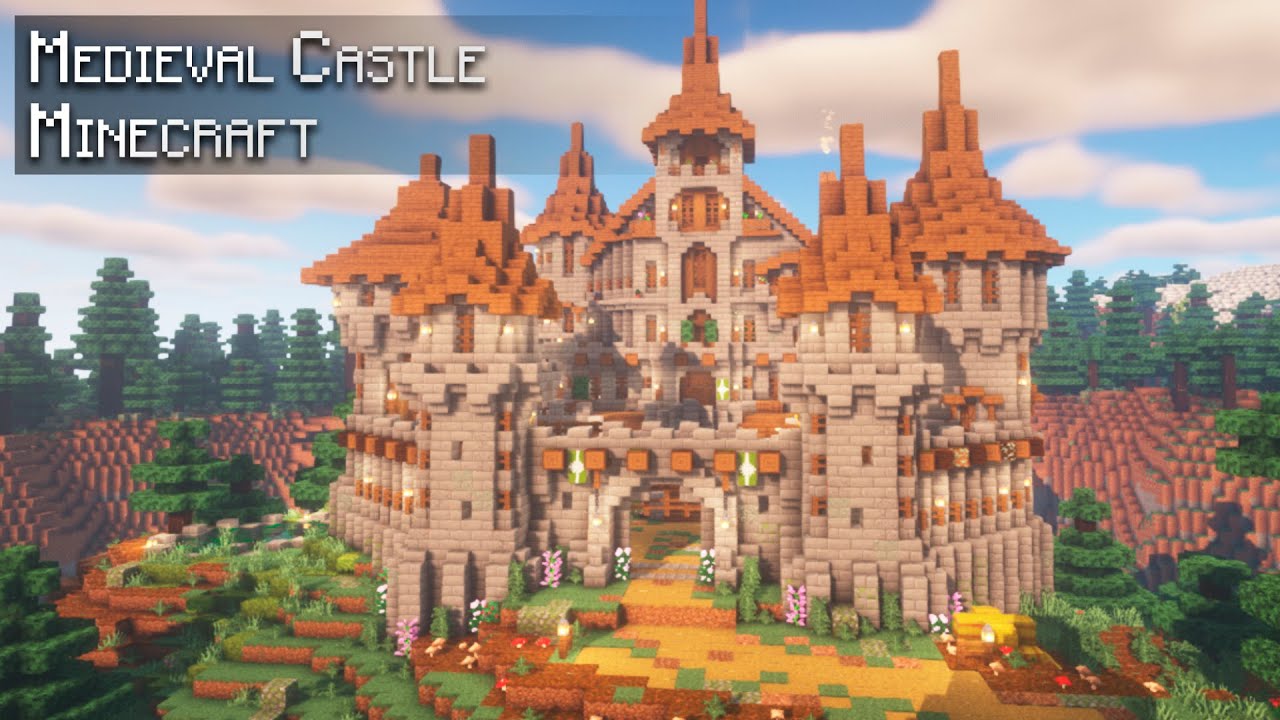
2. Castle
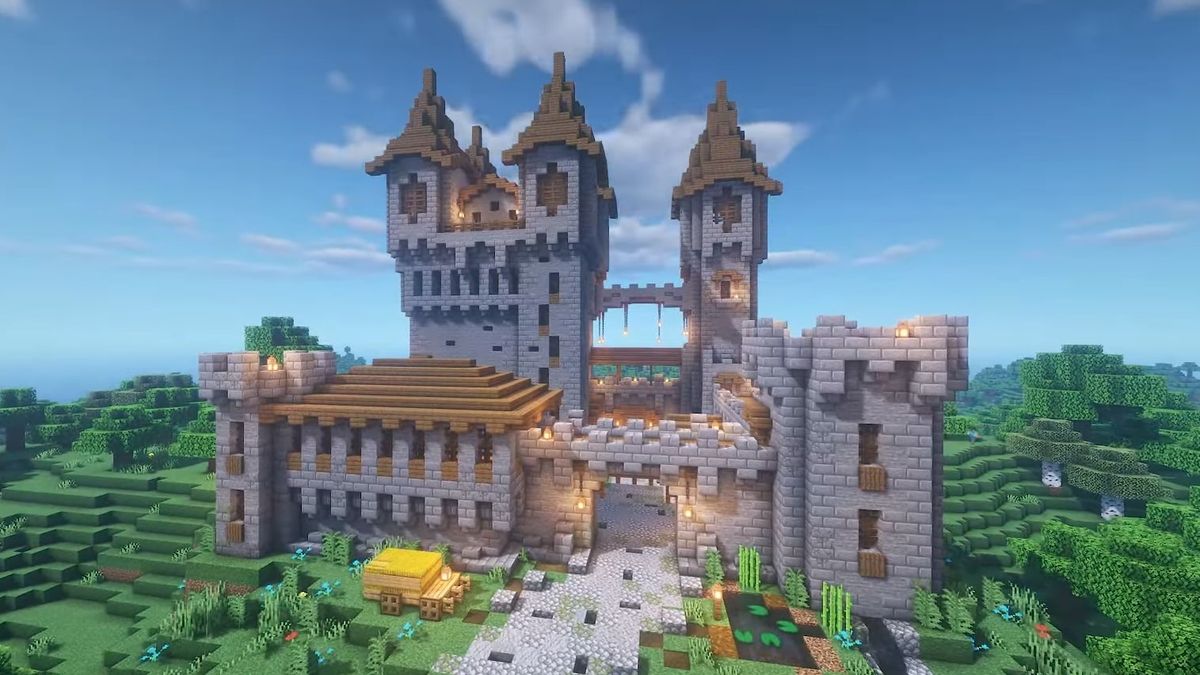
A castle is a great idea for a Minecraft project. You can create a castle that reflects your style and imagination. You can choose from different types of castles, such as:
- A medieval castle with flags, torches, hidden rooms, and tombs. You can use stone bricks, cobblestone, wood, and wool to build this kind of castle. You can also add some details like banners, paintings, armor stands, and bookshelves to make it more realistic. A medieval castle is perfect for a survival mode or an adventure map.
- A Victorian-inspired castle with impressive, large glass windows, a small brick chimney, and stone slabs covered in wooden beams. You can use stained glass, quartz blocks, bricks, and spruce wood to build this kind of castle. You can also add some details like flower pots, carpets, paintings, and chandeliers to make it more elegant. A Victorian-inspired castle is perfect for a creative mode or a role-playing map.
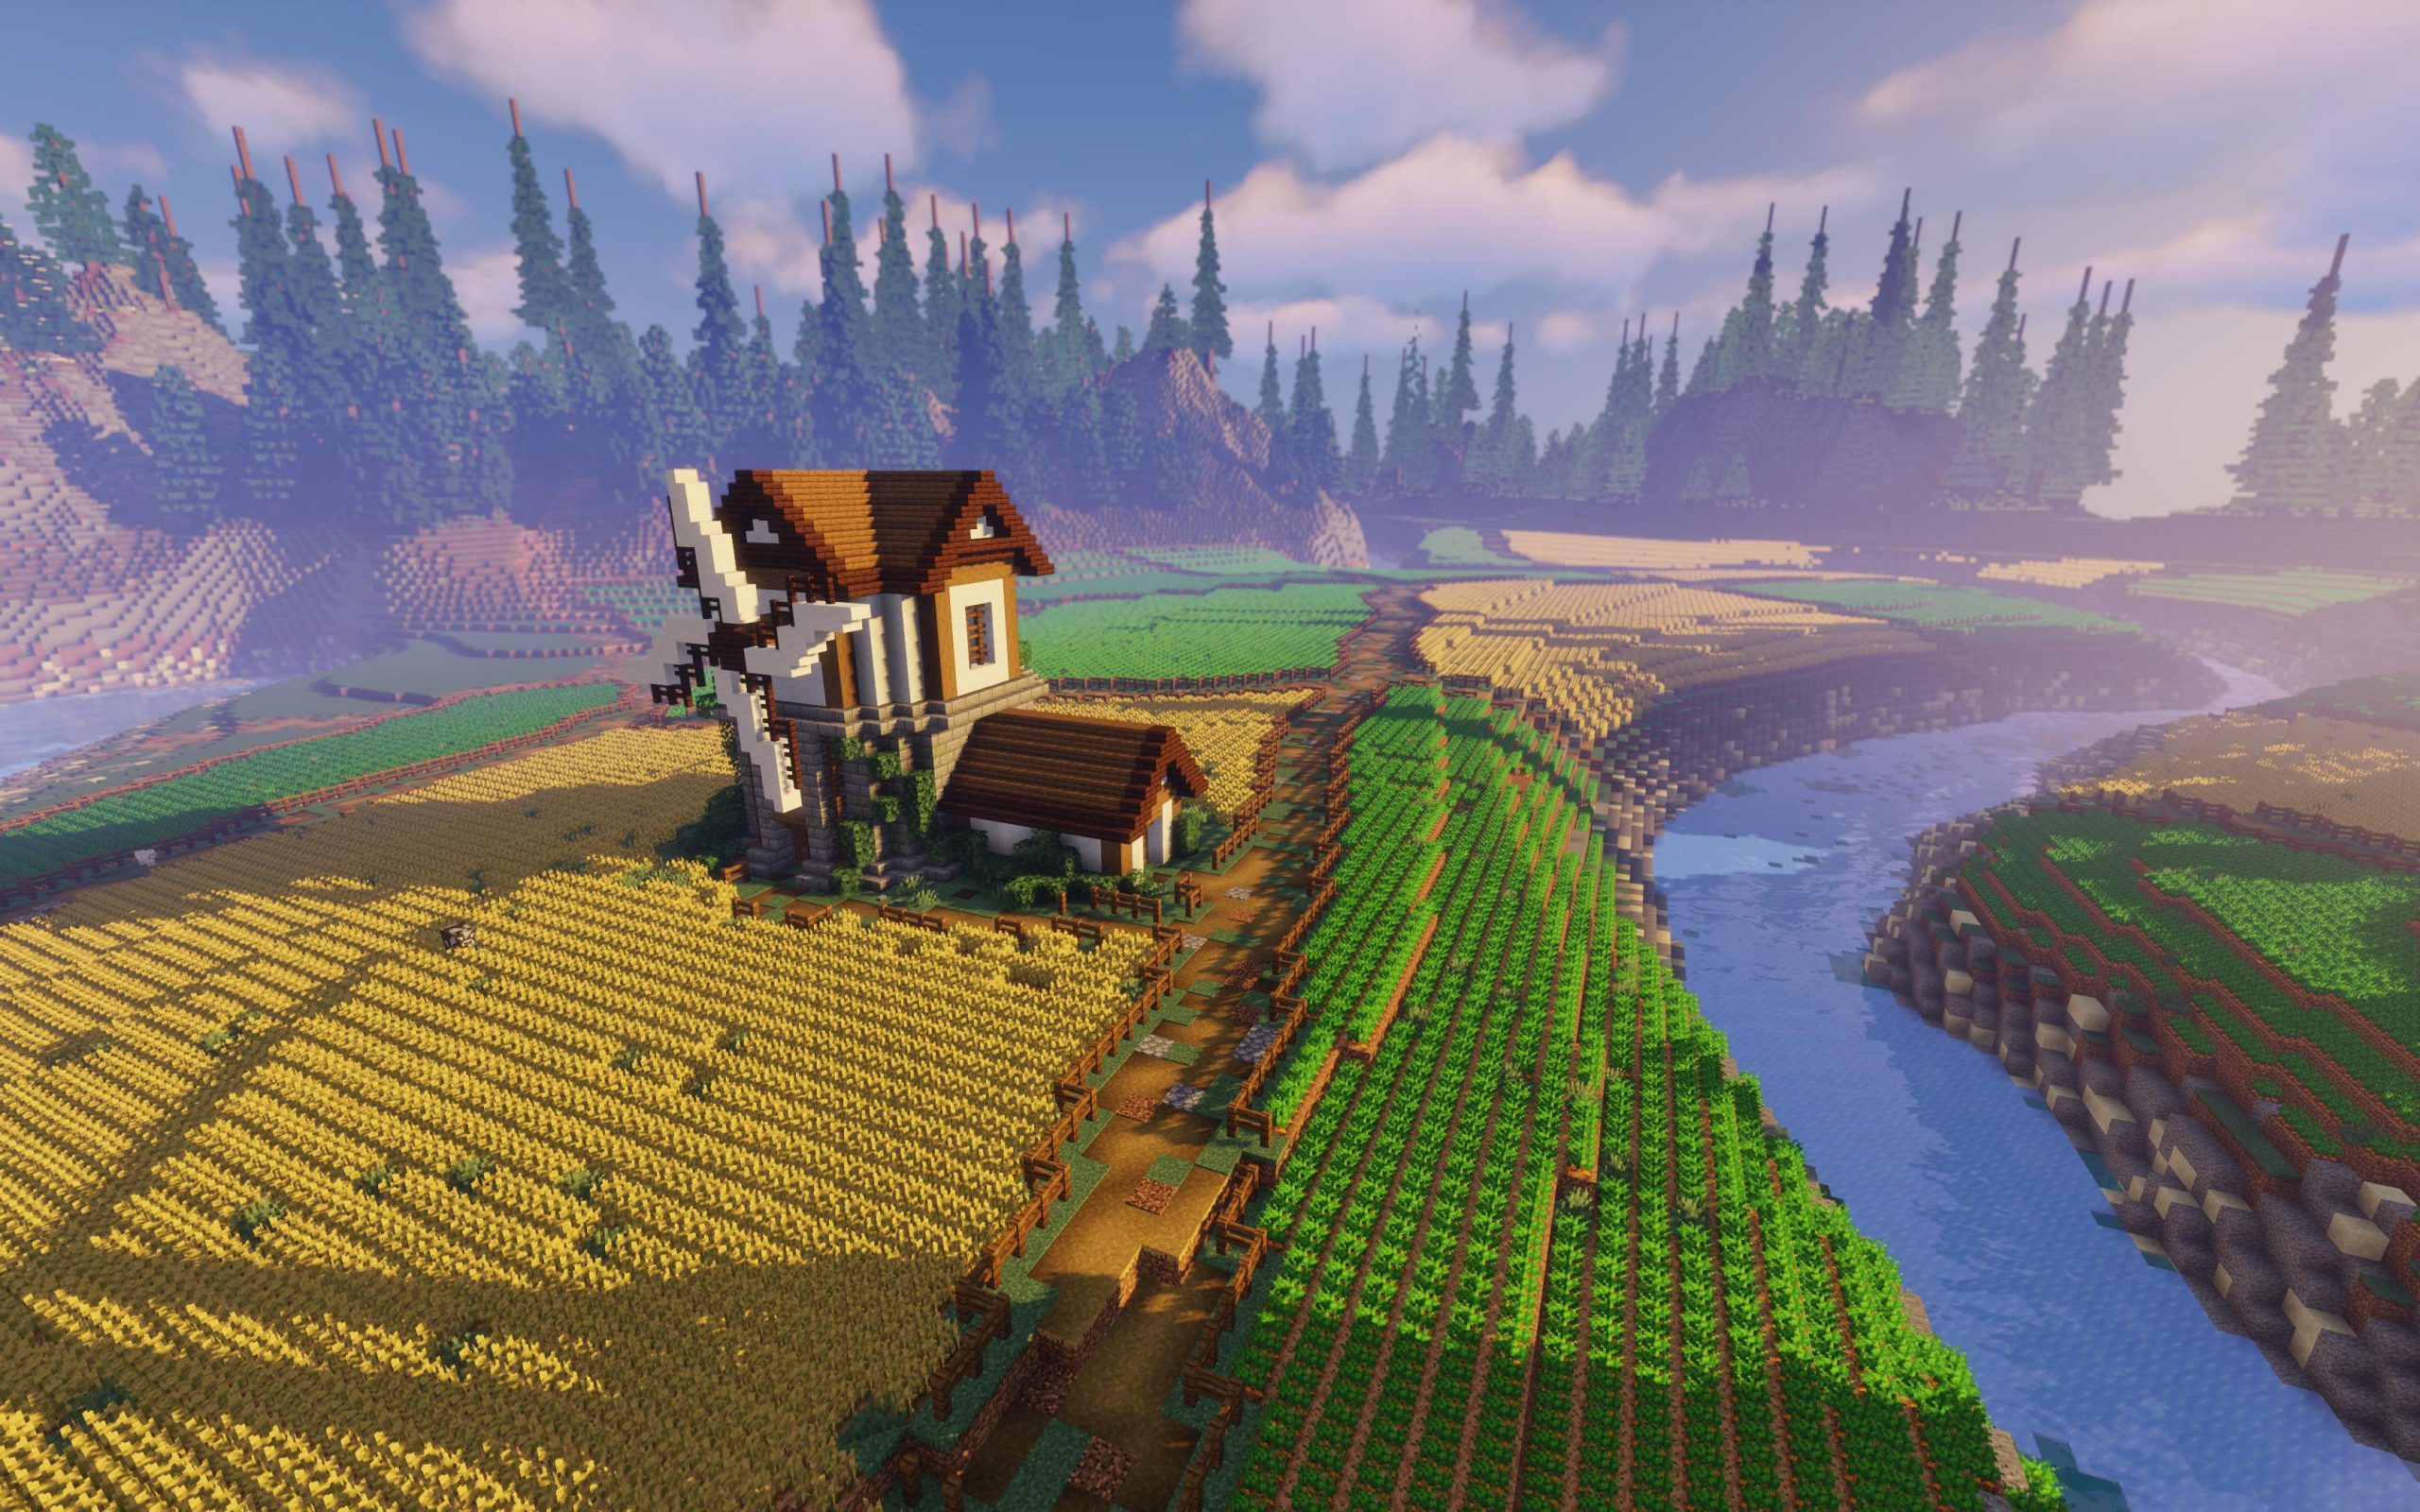
3. A farm
A farm is a useful and fun thing to build in Minecraft. You can grow different kinds of crops and animals on your farm, and use them for food, trading, or crafting. You can also make your farm look beautiful and realistic by adding some features, such as:
- A well-irrigated farmland with wheat, melons, pumpkins, and other crops. You can use water buckets, hoes, and seeds to create your farmland. You can also use fences, gates, and torches to protect your crops from mobs and light up your farm at night.
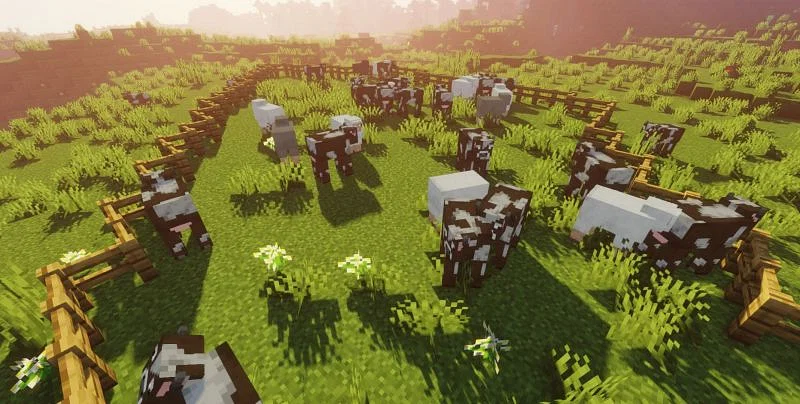
- An animal farm with cows, pigs, sheep, chickens, and other animals. You can use wheat, carrots, seeds, and other items to breed and feed your animals. You can also use shears, buckets, and swords to collect wool, milk, meat, eggs, and feathers from your animals. You can also use leads, name tags, and saddles to tame and transport your animals.
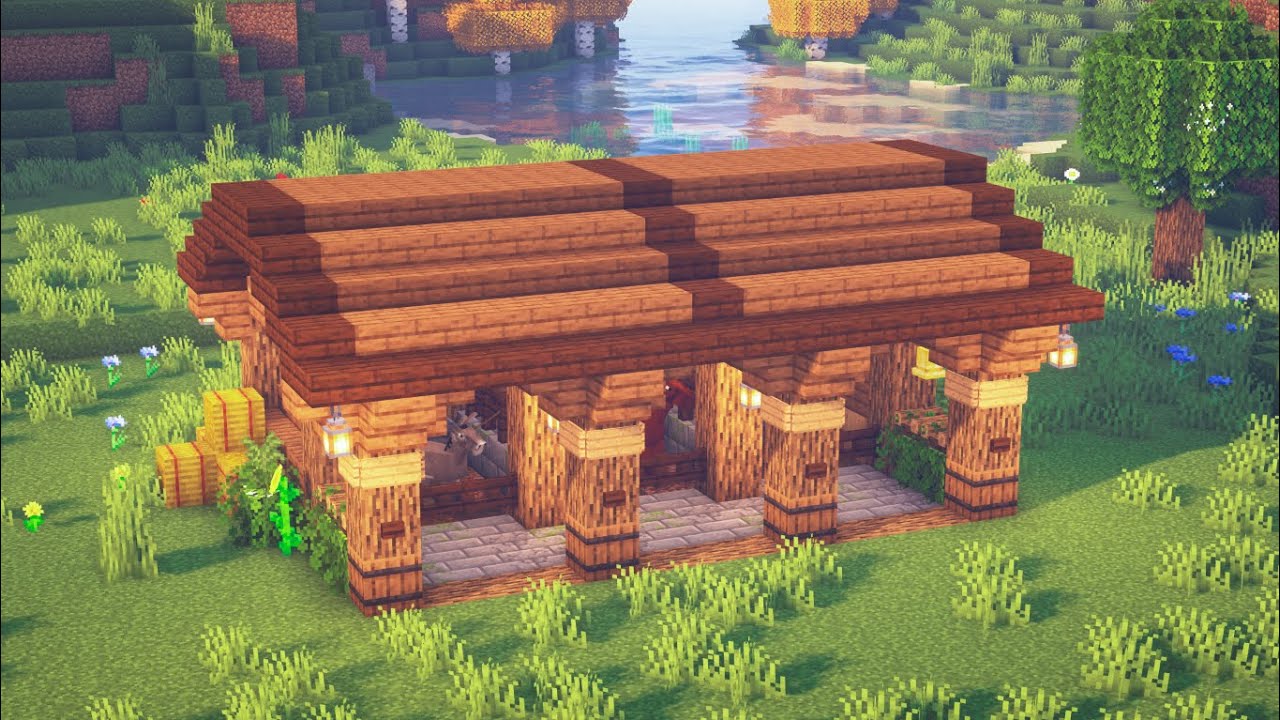
- A barn or a stable to store your animals and crops. You can use wood, stone, hay bales, and other blocks to build your barn or stable. You can also use chests, barrels, hoppers, and dispensers to store and sort your items. You can also use signs, item frames, and paintings to decorate and label your barn or stable.
4. Trees

It is indeed a wonderful experience to see a plant grow into a tree, especially if you planted it yourself.
In Minecraft, you have a variety of trees that you can cultivate: oak, birch, pine/spruce, jungle, dark oak, and acacia. Each of these trees has different characteristics, such as height, shape, color, and wood type. You can plant a sapling of your choice and wait for it to grow naturally, or you can use bone meal to speed up the process. You can also use shears to collect leaves from the trees, which you can use for decoration or composting. Trees are not only beautiful, but also useful for providing wood, saplings, apples, and cocoa beans.
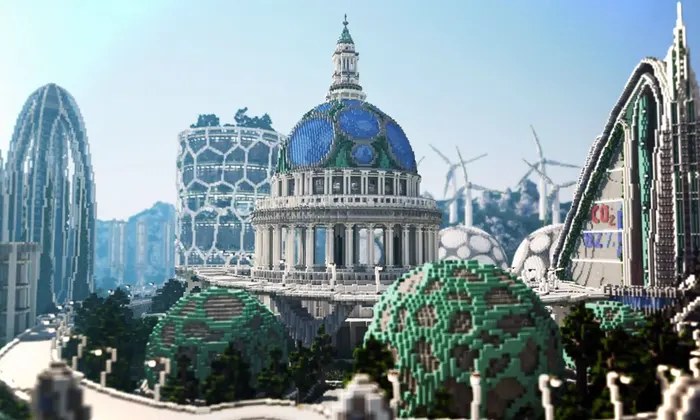
5. A city
A city is an amazing thing to build in Minecraft. You can create a city that reflects your vision and style. You can build modern city skyscrapers, parks, footpaths, paved roads, and lamp posts. You can also add some details like cars, buses, bikes, and pedestrians to make your city more lively. You can use different materials and colors to create different buildings and structures. You can also use redstone, command blocks, and other mechanisms to make your city more functional and interactive.
You can also use a shared server to collaborate with other players and build gorgeous modern towns. You can share your ideas, resources, and skills with other builders. You can also explore and admire other players’ creations. You can join a server that suits your preferences and goals, or you can create your own server and invite others to join. Building a city with others can be a fun and rewarding experience.
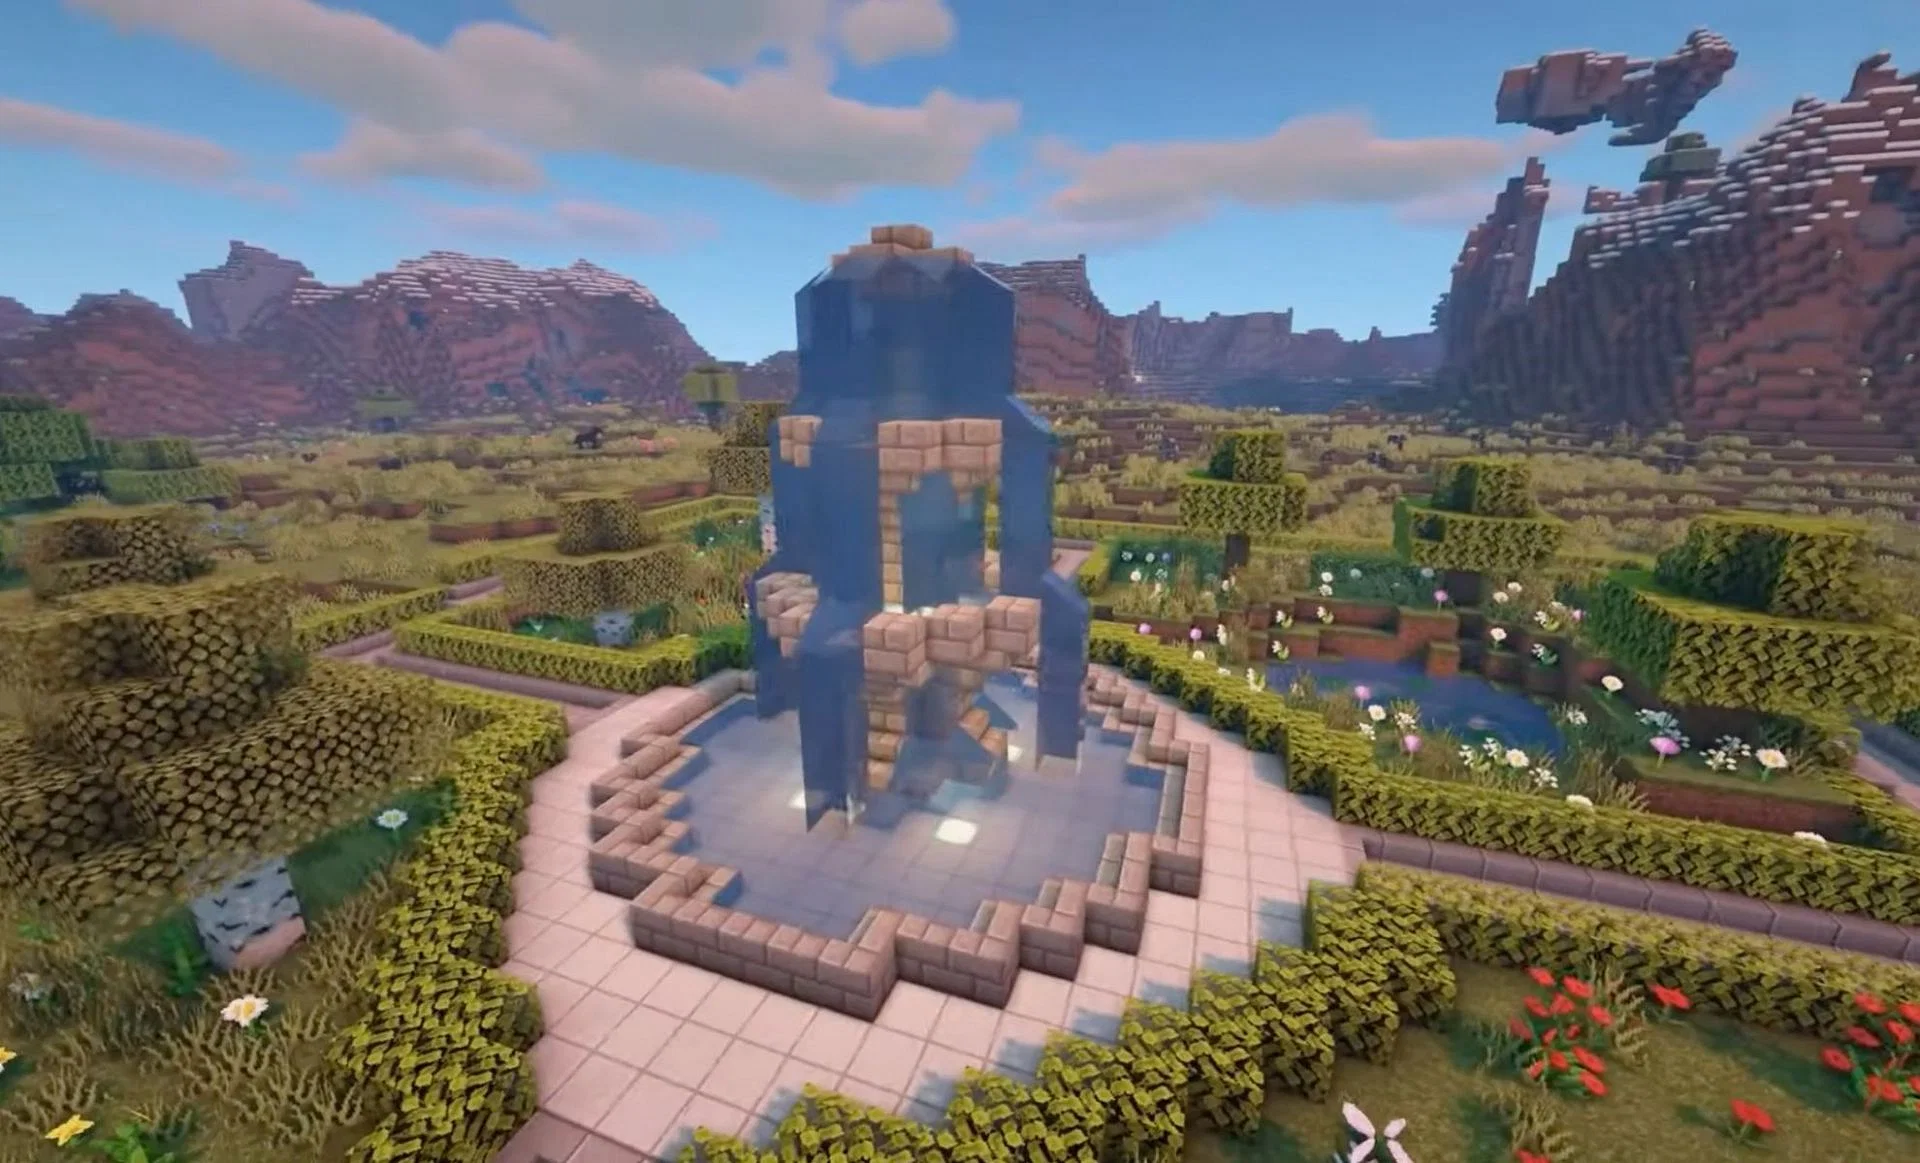
6. Garden

A garden is a lovely thing to build in Minecraft. You can create a garden where you can plant all your favorite flowers and enjoy their beauty and fragrance. You can also add some features to your garden, such as:
- A fountain or a pond with water lilies, fish, and turtles. You can use water buckets, stone, dirt, and other blocks to create your fountain or pond. You can also use bone meal to grow water lilies on the water surface. You can also use buckets or fishing rods to catch and release fish and turtles in your pond.
- A gazebo or a pergola with vines, lanterns, and benches. You can use wood, fences, stairs, and other blocks to build your gazebo or pergola. You can also use vines, leaves, flowers, and other plants to decorate your gazebo or pergola. You can also use lanterns, torches, or glowstone to light up your gazebo or pergola at night. You can also use slabs, stairs, or carpets to make benches where you can sit and relax in your garden.
- A greenhouse or a flower shop with different kinds of flowers, pots, and shelves. You can use glass, wood, iron bars, and other blocks to build your greenhouse or flower shop. You can also use different types of flowers, such as roses, tulips, daisies, sunflowers, and orchids to fill your greenhouse or flower shop. You can also use clay pots, chests, barrels, and item frames to store and display your flowers. You can also use signs, banners, and paintings to name and advertise your greenhouse or flower shop.

A garden is a great way to express your creativity and enjoy nature in Minecraft. You can build a garden that suits your taste and mood. You can also invite your friends to visit your garden and share your joy. Building a garden can be a fun and relaxing activity in Minecraft.
7. Sea Town

An island is a wonderful thing to build in Minecraft. You can create an island that is your own paradise and escape from the mainland. You can also connect your island with a series of underground tunnels that allow you to travel and explore. You can also make your island a place of living and observe the activities of thousands of villagers. Here are some tips on how to build an island in Minecraft:
- To create an island, you need to use a custom world type called “Buffet”. You can choose the biome and the terrain of your island, such as ocean, beach, plains, forest, or desert. You can also adjust the size and shape of your island using the world options.
- To connect your island with underground tunnels, you need to use a tool called “WorldEdit”. You can use this tool to create and edit large areas of blocks quickly and easily. You can use commands such as //cyl, //hcyl, //sphere, and //hsphere to create tunnels of different shapes and sizes. You can also use commands such as //set, //replace, and //fill to change the blocks inside the tunnels.
- To make your island a place of living and observe the villagers, you need to use a mod called “Millénaire”. This mod adds new villages, cultures, quests, and interactions to Minecraft. You can find and visit different types of villages, such as Norman, Japanese, Byzantine, Mayan, and Indian. You can also trade with the villagers, help them build and improve their villages, and learn about their history and culture.
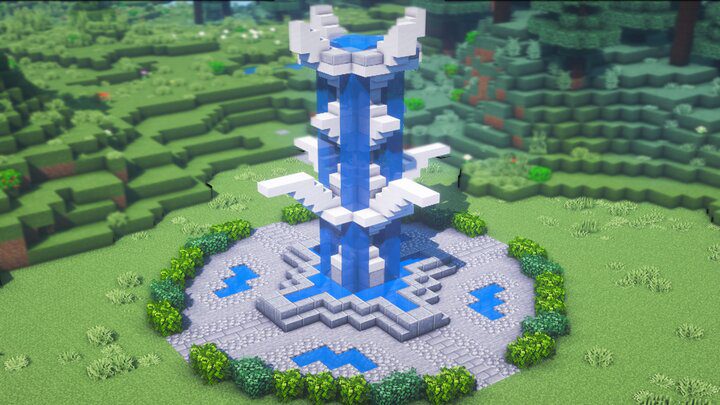
8. Fountain
A fountain is a beautiful thing to build in Minecraft. You can create a fountain that suits your style and preference. You can build a fountain that is small, minimalist, large, intricate, or anything in between. You can also use different materials and colors to create your fountain. However, you need to have both water and building resources to make a fountain. Here are some steps on how to build a fountain in Minecraft:
- First, you need to find a suitable location for your fountain. You can build your fountain in your garden, in your town square, or anywhere else you like. You need to have enough space and a flat surface to build your fountain.
- Second, you need to gather the materials for your fountain. You need to have water buckets, blocks, stairs, slabs, fences, and other items that you want to use for your fountain. You can use any type of blocks, such as stone, brick, quartz, or wood. You can also use different colors and textures to make your fountain more attractive.

- Third, you need to build the base of your fountain. You can use blocks to create a circular, square, or rectangular shape for your base. You can also use stairs and slabs to create curves and edges for your base. You can make your base as big or as small as you want, depending on the size of your fountain.
- Fourth, you need to build the pillar of your fountain. You can use blocks to create a vertical column that rises from the center of your base. You can also use fences, walls, or iron bars to create a decorative frame around your pillar. You can make your pillar as tall or as short as you want, depending on the height of your fountain.
- Fifth, you need to build the top of your fountain. You can use blocks to create a flat or curved surface that covers the top of your pillar. You can also use stairs and slabs to create a rim or a lip around the top of your fountain. You can also use blocks, stairs, slabs, or fences to create a spout or a nozzle for your fountain.
- Sixth, you need to add water to your fountain. You can use water buckets to fill the top of your fountain with water. You can also use water buckets to create streams or jets of water that flow from the spout or nozzle of your fountain. You can also use water buckets to create pools or basins of water around the base of your fountain.
- Seventh, you need to decorate and light up your fountain. You can use flowers, plants, vines, and other items to add some greenery and color to your fountain. You can also use lanterns, torches, glowstone, or sea lanterns to add some brightness and sparkle to your fountain. You can also use banners, paintings, signs, or item frames to add some details and personality to your fountain.
You have successfully built a fountain in Minecraft. You can enjoy the beauty and sound of your fountain in your world. You can also show off your fountain to your friends and other players. Building a fountain can be a fun and rewarding activity in Minecraft.
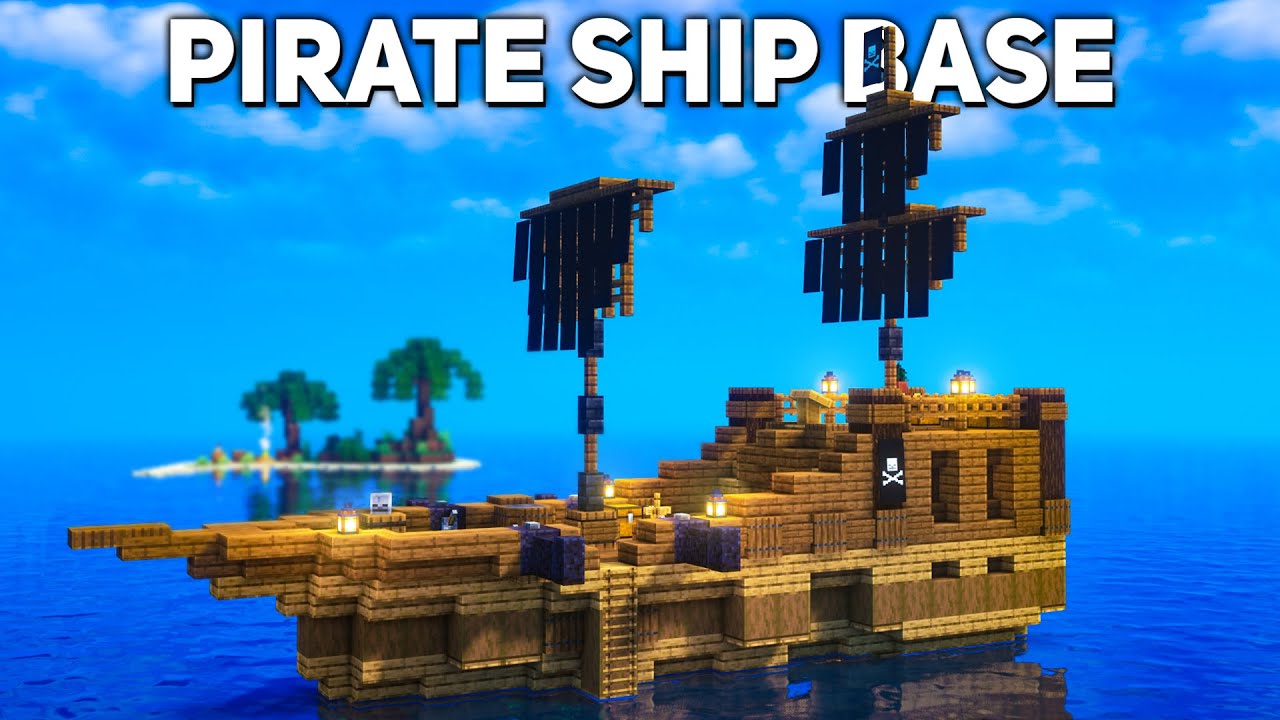
9. Pirate ship
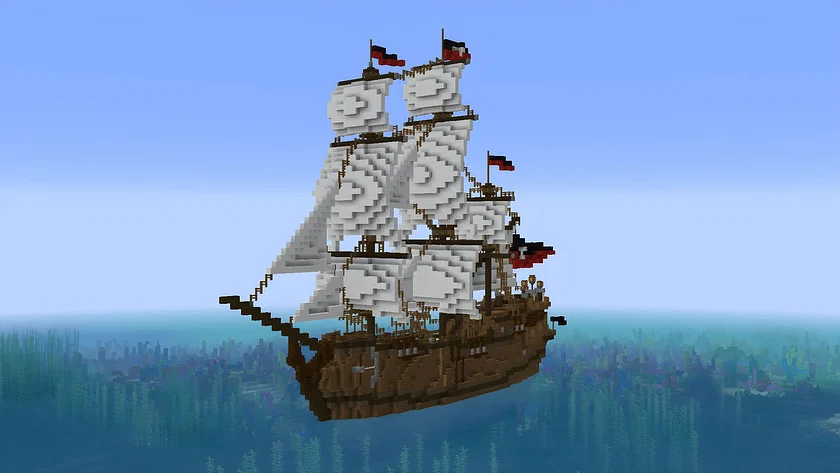
A pirate ship is an awesome thing to build in Minecraft. You can create a pirate ship that is adventurous and exciting. You can also sail your pirate ship across the seas and explore new lands and treasures. However, you need to have some skills and resources to build a pirate ship. Here are some tips on how to build a pirate ship in Minecraft:
- First, you need to find a suitable location for your pirate ship. You can build your pirate ship in the ocean, in a river, or in a lake. You need to have enough water and space to build your pirate ship.
- Second, you need to gather the materials for your pirate ship. You need to have wood, wool, fences, stairs, slabs, trapdoors, buttons, signs, banners, and other items that you want to use for your pirate ship. You can use any type of wood, such as oak, spruce, birch, or dark oak. You can also use different colors of wool to create sails and flags for your pirate ship.
- Third, you need to build the hull of your pirate ship. You can use wood blocks to create a long and narrow shape for your hull. You can also use stairs and slabs to create curves and edges for your hull. You can make your hull as big or as small as you want, depending on the size of your pirate ship.
- Fourth, you need to build the deck of your pirate ship. You can use wood slabs to create a flat surface that covers the top of your hull. You can also use fences, trapdoors, buttons, signs, and other items to create details and features for your deck. You can also add some chests, barrels, cannons, and other items to store and display your loot and weapons on your deck.
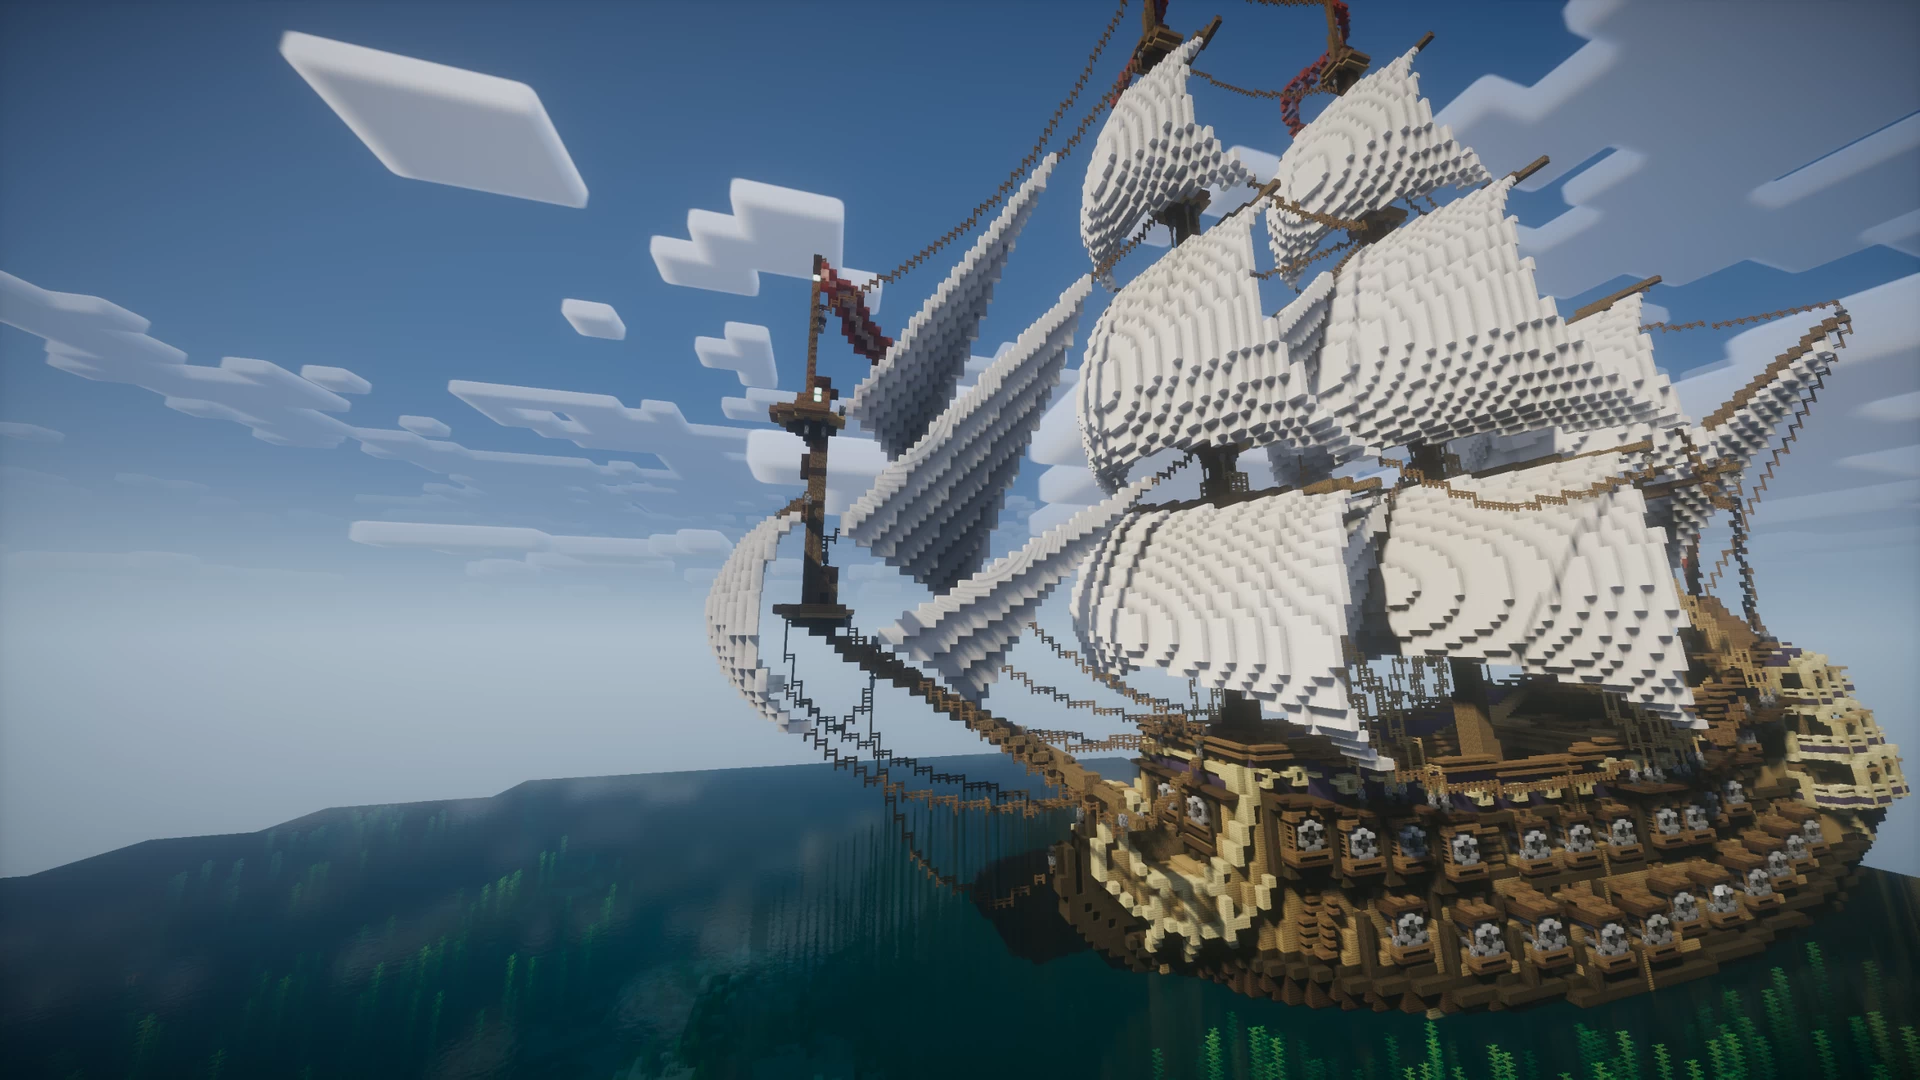
- Fifth, you need to build the mast and the sails of your pirate ship. You can use wood blocks or fences to create a vertical column that rises from the center of your deck. You can also use wool blocks or banners to create sails that hang from the mast. You can also use fences or iron bars to create ropes that connect the mast and the sails. You can also use different colors and patterns of wool or banners to create flags that decorate your mast and sails.
- Sixth, you need to build the cabin and the crow’s nest of your pirate ship. You can use wood blocks or planks to create a small room that is attached to the back of your deck. You can also use stairs, slabs, trapdoors, doors, windows, and other items to create details and features for your cabin. You can also add some beds, bookshelves, maps, and other items to make your cabin more comfortable and cozy. You can also use wood blocks or fences to create a small platform that is attached to the top of your mast. You can also use ladders or vines to create a way to climb up and down from your crow’s nest. You can also add some torches or lanterns to light up your crow’s nest at night.
- Seventh, you need to decorate and customize your pirate ship. You can use flowers, plants, vines, skulls, bones, and other items to add some personality and style to your pirate ship. You can also use signs, paintings, item frames, or armor stands to add some names and faces to your pirate ship. You can also use banners, shields, or heads to add some symbols and logos to your pirate ship.
You have successfully built a pirate ship in Minecraft. You can enjoy the thrill and adventure of sailing your pirate ship in your world. You can also challenge yourself by riding out storms at sea or fighting other pirates or mobs on your pirate ship. Building a pirate ship can be a fun and rewarding activity in Minecraft.
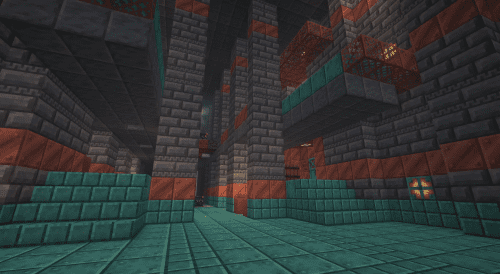
10. Underground City
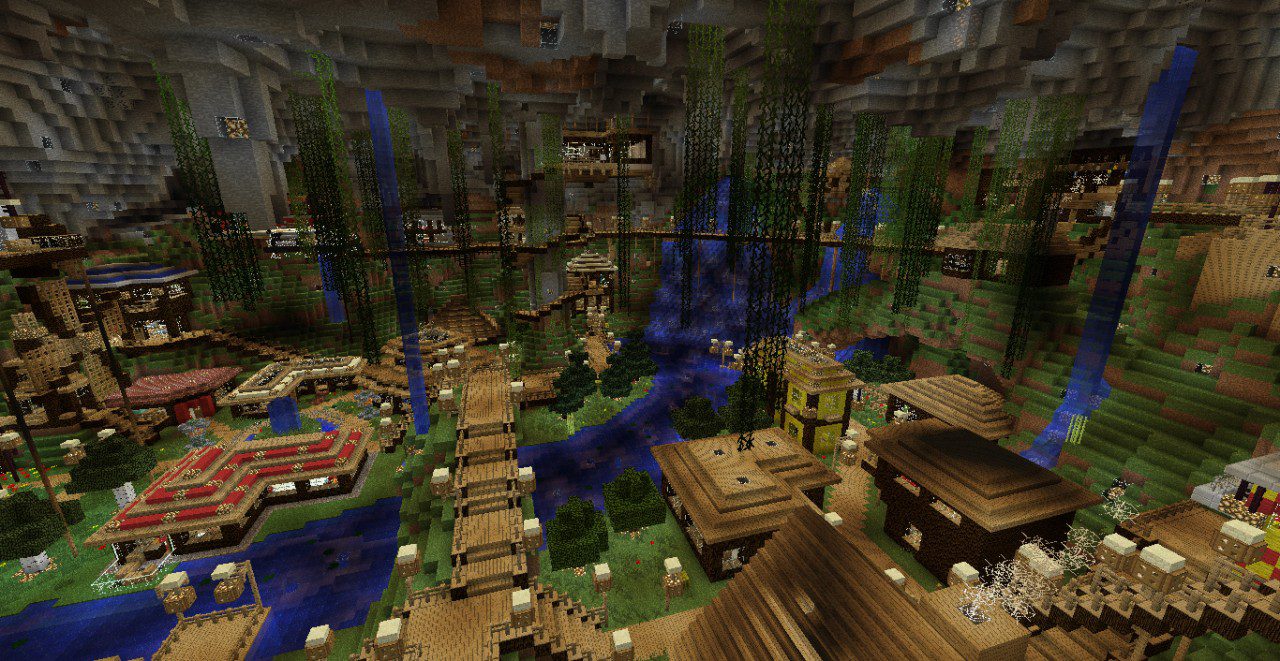
An underground city is a fascinating thing to build in Minecraft. You can create an underground city that is hidden and mysterious. You can also explore and discover new things in your underground city. However, you need to have some patience and skills to build an underground city. Here are some tips on how to build an underground city in Minecraft:
- First, you need to find a suitable location for your underground city. You can build your underground city under a mountain, under a desert, under an ocean, or anywhere else you like. You need to have enough depth and space to build your underground city.
- Second, you need to dig out the area for your underground city. You can use tools such as pickaxes, shovels, axes, and TNT to break and remove the blocks that are in your way. You can also use torches, glowstone, or sea lanterns to light up your underground city as you dig. You can also use buckets, sponges, or sand to deal with water or lava that you encounter as you dig.
- Third, you need to design and build the structures and features of your underground city. You can use blocks such as stone, brick, quartz, or concrete to create the walls, floors, and ceilings of your underground city. You can also use stairs, slabs, fences, doors, windows, and other items to create details and features for your underground city. You can also use redstone, command blocks, pistons, and other mechanisms to create functions and interactions for your underground city.
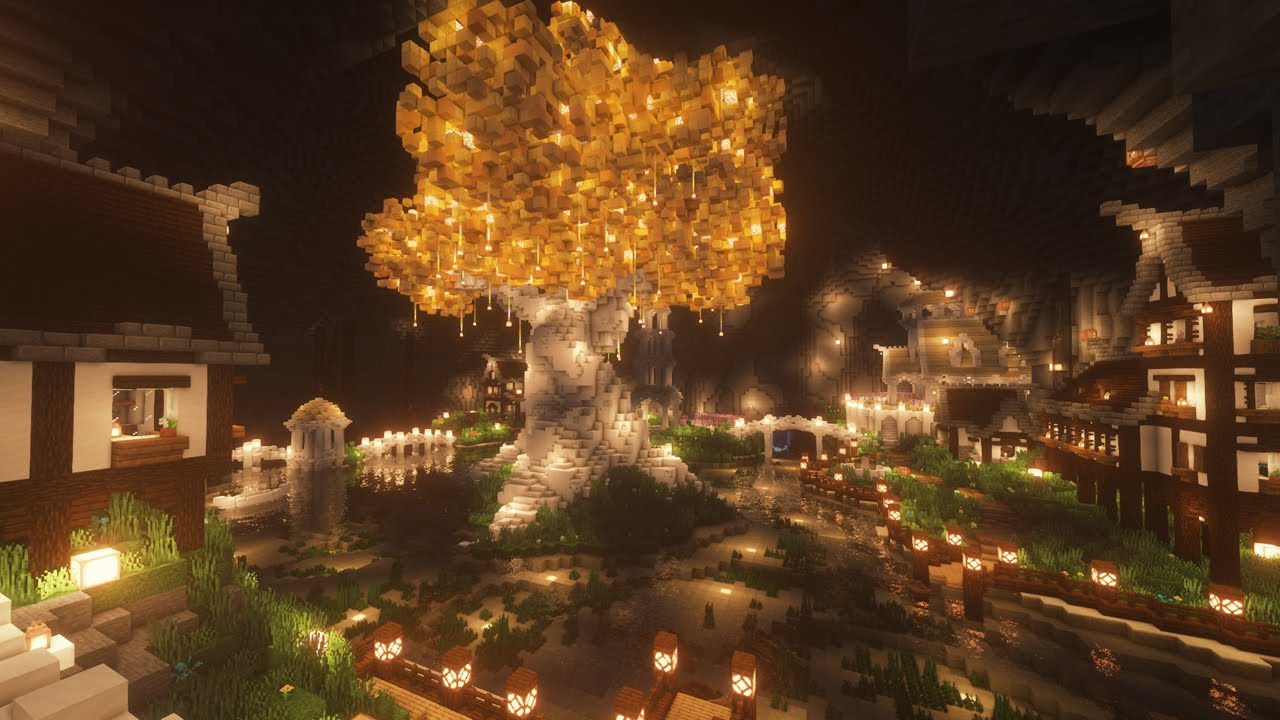
- Fourth, you need to decorate and customize your underground city. You can use plants, flowers, mushrooms, vines, and other items to add some greenery and color to your underground city. You can also use paintings, banners, signs, item frames, or armor stands to add some personality and style to your underground city. You can also use chests, barrels, hoppers, dispensers, or droppers to store and sort your items in your underground city.
- Fifth, you need to populate and populate your underground city. You can use spawn eggs, mob spawners, or commands to spawn different types of mobs in your underground city. You can also use name tags, leads, saddles, or carrots on sticks to tame and transport your mobs in your underground city. You can also use villagers, iron golems, snow golems, or cats to create a community and protect your underground city.

You have successfully built an underground city in Minecraft. You can enjoy the challenge and adventure of living in your underground city in your world. You can also invite your friends to visit your underground city and share your experience. Building an underground city can be a fun and rewarding activity in Minecraft.
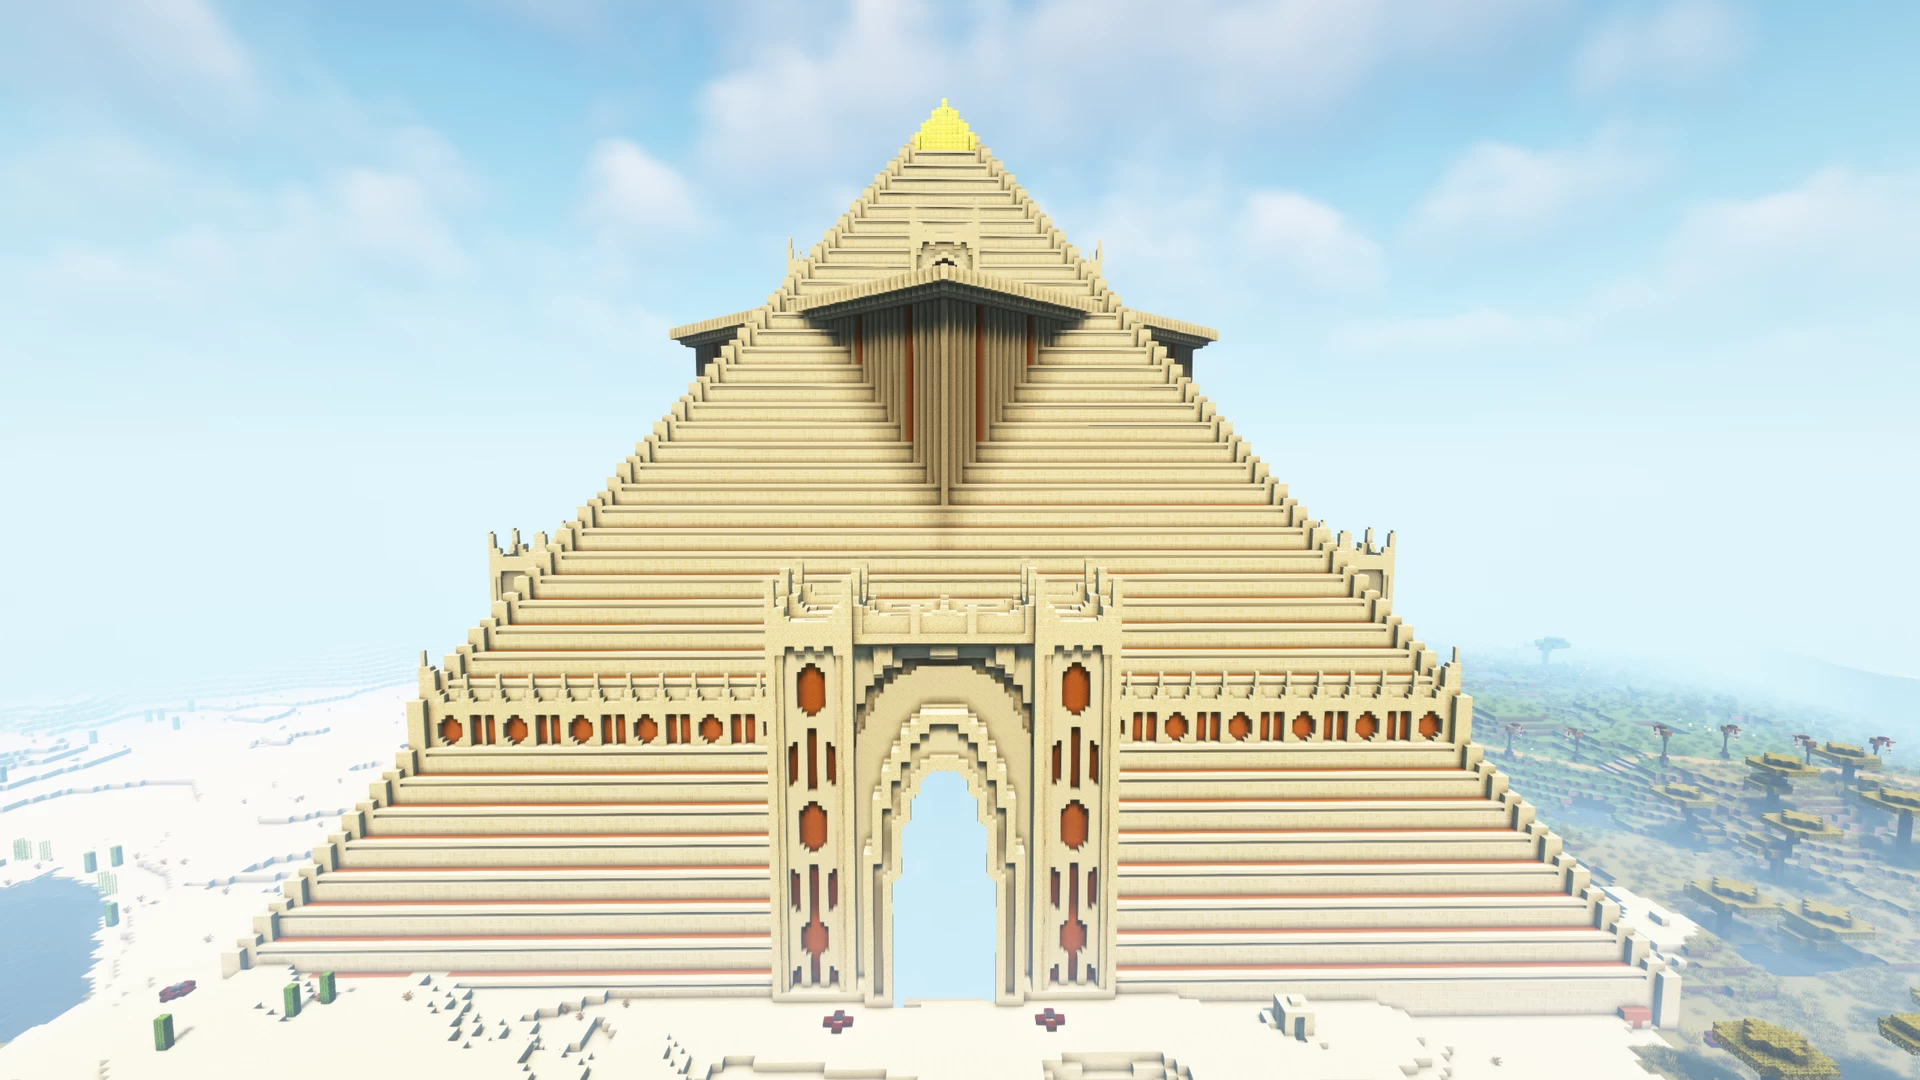
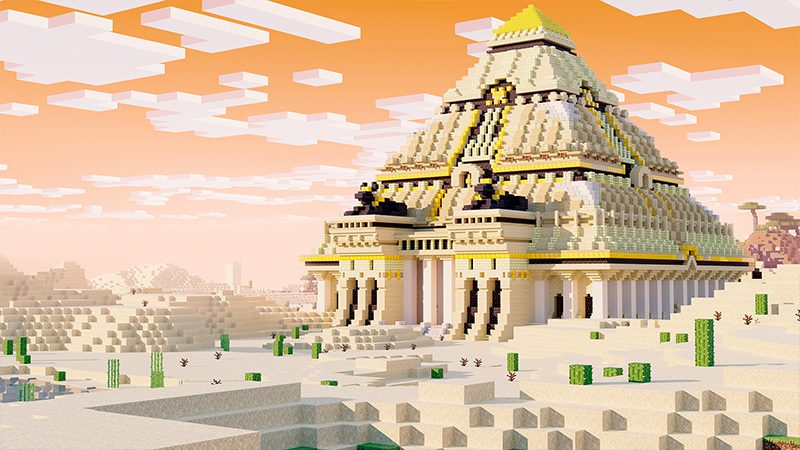
11. Pyramid
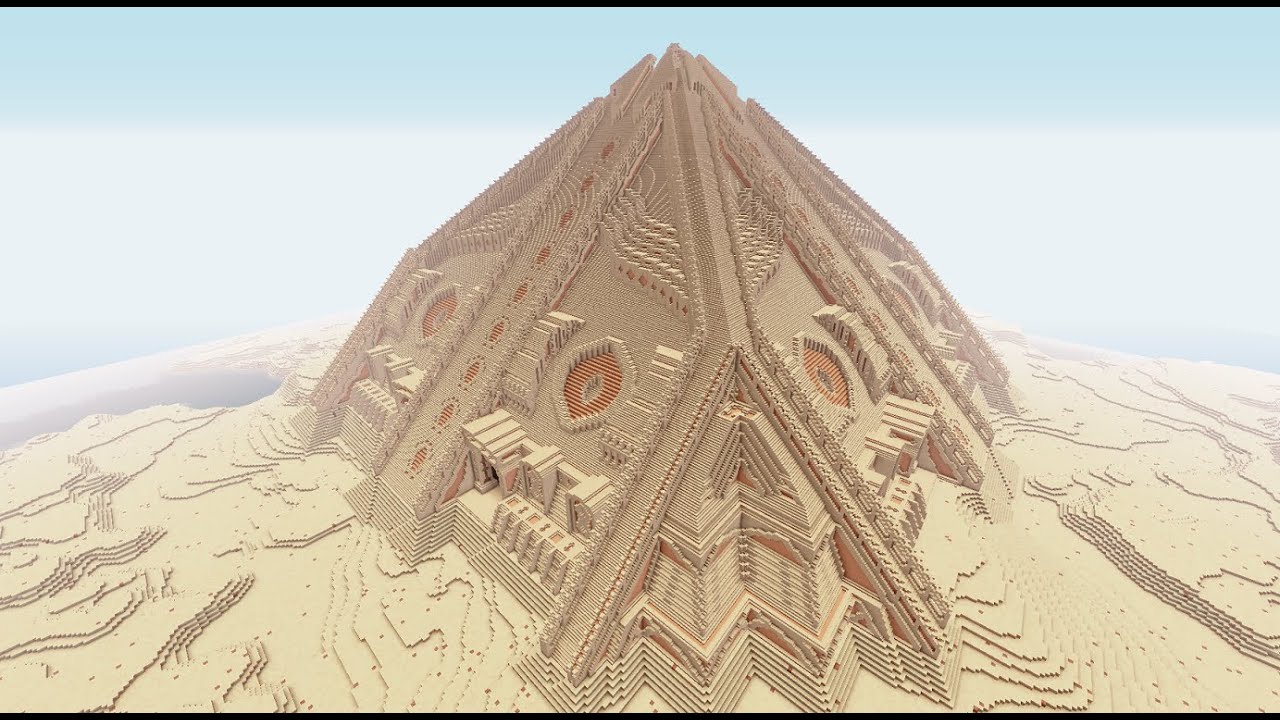
It sounds like you are trying to build a pyramid in Minecraft. That is a cool and creative thing to do. However, your instructions are not very clear and detailed. You did not specify the size, shape, or material of your pyramid. You also did not explain how to make the tower or how to surround the blocks with stairs. Here are some steps on how to build a pyramid in Minecraft more clearly and easily:
- First, you need to decide the size, shape, and material of your pyramid. You can make your pyramid square or triangular, and you can make it as big or as small as you want. You can also use any type of blocks, such as sandstone, quartz, or gold. For this example, let’s say we want to make a square pyramid with a base of 21 blocks by 21 blocks, and we want to use sandstone blocks.
- Second, you need to find a suitable location for your pyramid. You can build your pyramid in the desert, in the plains, or anywhere else you like. You need to have enough space and a flat surface to build your pyramid.
- Third, you need to mark the corners of your pyramid. You can use torches, wool, or any other blocks that are easy to see and remove. You need to place four blocks at the corners of a 21 by 21 square area. This will be the base of your pyramid.
- Fourth, you need to fill the base of your pyramid with blocks. You can use sandstone blocks or any other blocks that you want for your pyramid. You need to place 21 by 21 blocks inside the square area that you marked with the corner blocks. This will be the first layer of your pyramid.
- Fifth, you need to make the next layer of your pyramid. You can use sandstone stairs or any other stairs that match your blocks for your pyramid. You need to place stairs along the edges of the first layer of your pyramid, facing inward. You also need to leave a one-block gap between the stairs and the corner blocks. This will create a slope for your pyramid.
- Sixth, you need to repeat the previous step until you reach the top of your pyramid. You need to place stairs along the edges of each layer of your pyramid, facing inward. You also need to leave a one-block gap between the stairs and the corner blocks of each layer. You also need to reduce the size of each layer by two blocks from each side, creating a smaller square area for each layer. This will make your pyramid narrower as it goes up.
- Seventh, you need to finish the top of your pyramid. You can use sandstone slabs or any other slabs that match your blocks for your pyramid. You need to place slabs on top of the last layer of stairs that you placed on your pyramid. This will create a flat surface for the top of your pyramid.
- Eighth, you need to remove the corner blocks and any other blocks that you used to mark your pyramid. You can use tools such as pickaxes, shovels, axes, or shears to break and remove the blocks that you don’t need for your pyramid. This will make your pyramid look cleaner and smoother.
You have successfully built a pyramid in Minecraft. You can enjoy the beauty and majesty of your pyramid in your world. You can also add some details and features to your pyramid, such as doors, windows, chambers, traps, or treasures. Building a pyramid can be a fun and rewarding activity in Minecraft.
12. Pixel Art

Pixel art is a form of digital art that uses pixels as the basic elements. Pixel art can be used to create various images, such as characters, landscapes, icons, or logos. Pixel art can be made in Minecraft by using different types of blocks to create different colors and shapes.
One example of pixel art that you can make in Minecraft is a little pony. A little pony is a cute and colorful creature that is popular among many people. You can use wool blocks to create the body, mane, tail, eyes, and cutie mark of your little pony. You can also use different colors of wool to create different types of ponies, such as earth ponies, unicorns, pegasi, or alicorns. You can also use fences, buttons, signs, or banners to add some details and features to your little pony.
![]()
Another example of pixel art that you can make in Minecraft is Nyan Cat. Nyan Cat is a viral internet meme that features a cat with a Pop-Tart body flying through space with a rainbow trail. You can use wool blocks to create the cat, the Pop-Tart, and the rainbow. You can also use glass blocks to create the stars and planets in the background. You can also use redstone, command blocks, note blocks, or jukeboxes to add some sound and movement to your Nyan Cat.
Pixel art is a fun and creative thing to do in Minecraft. You can use your imagination and skills to create pixel art that reflects your style and personality. You can also share your pixel art with your friends and other players. Building pixel art can be a fun and rewarding activity in Minecraft.
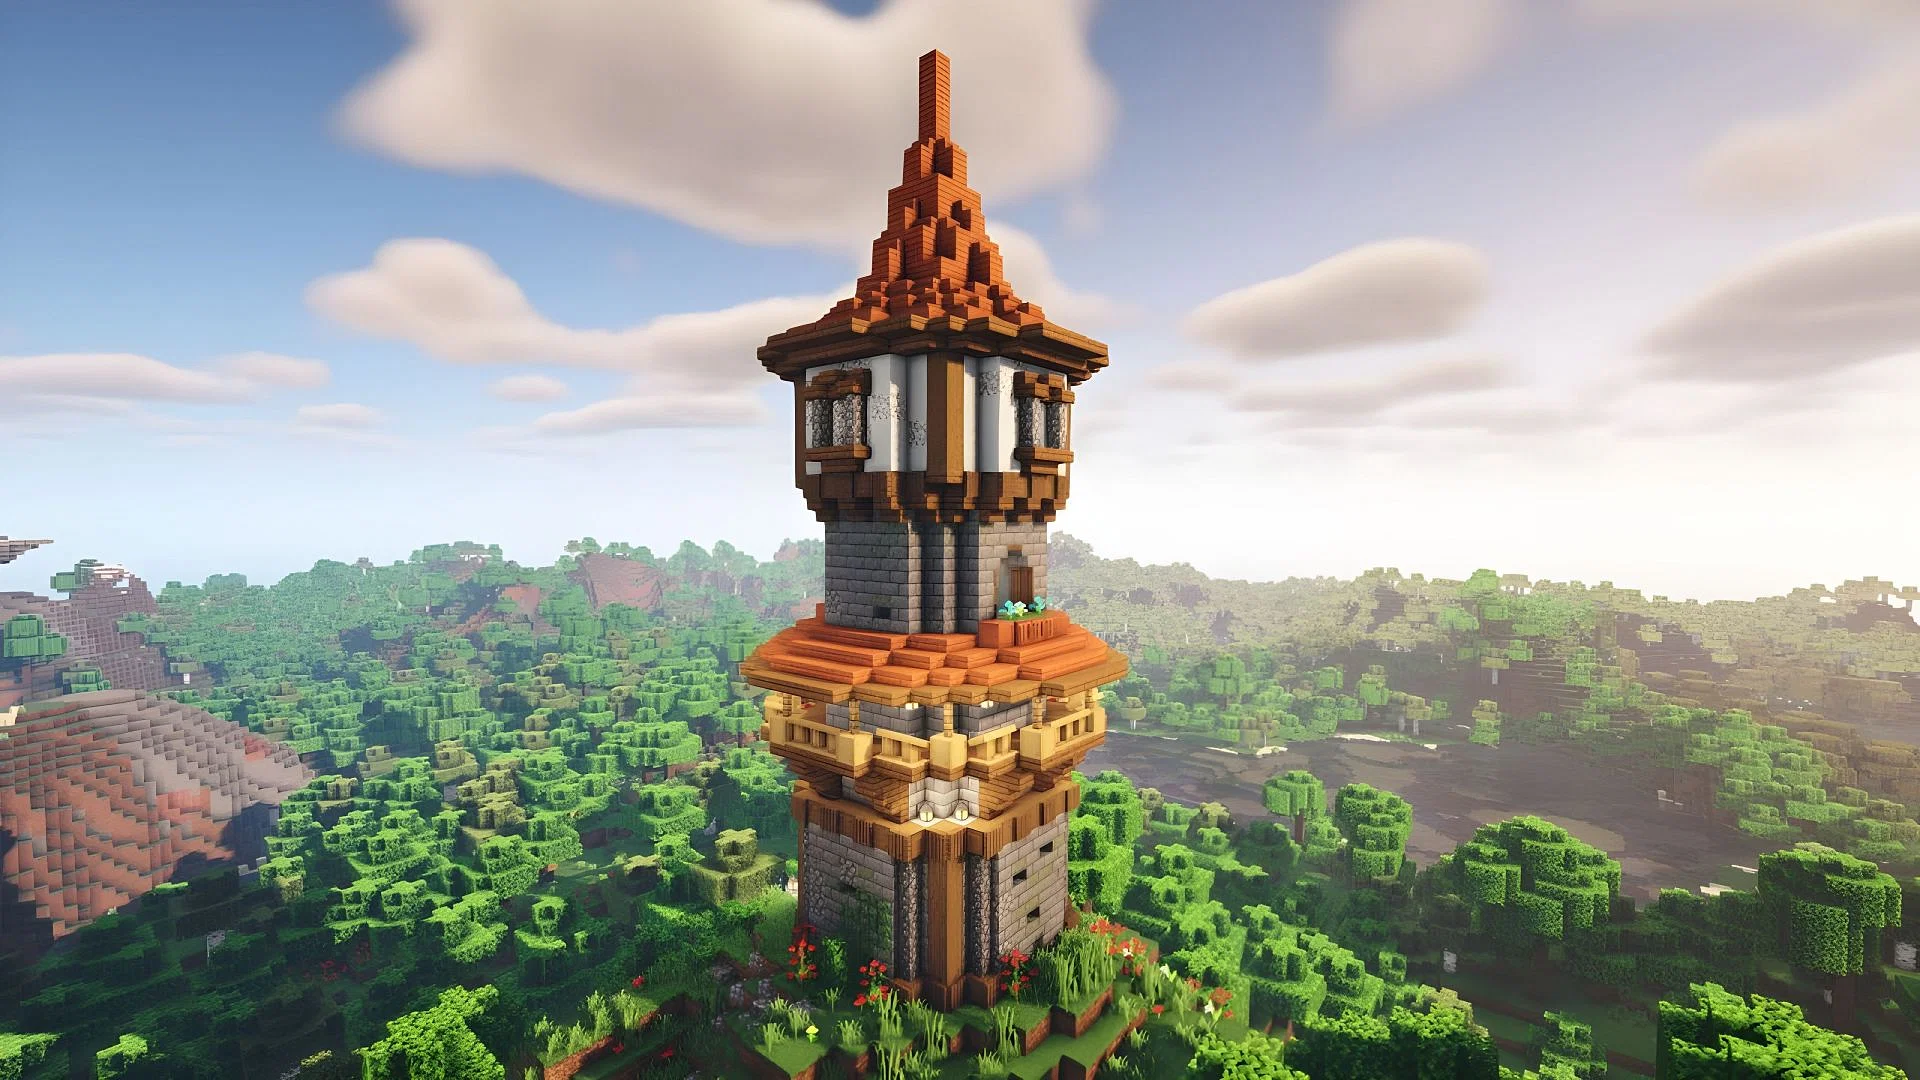
13. Watchtower
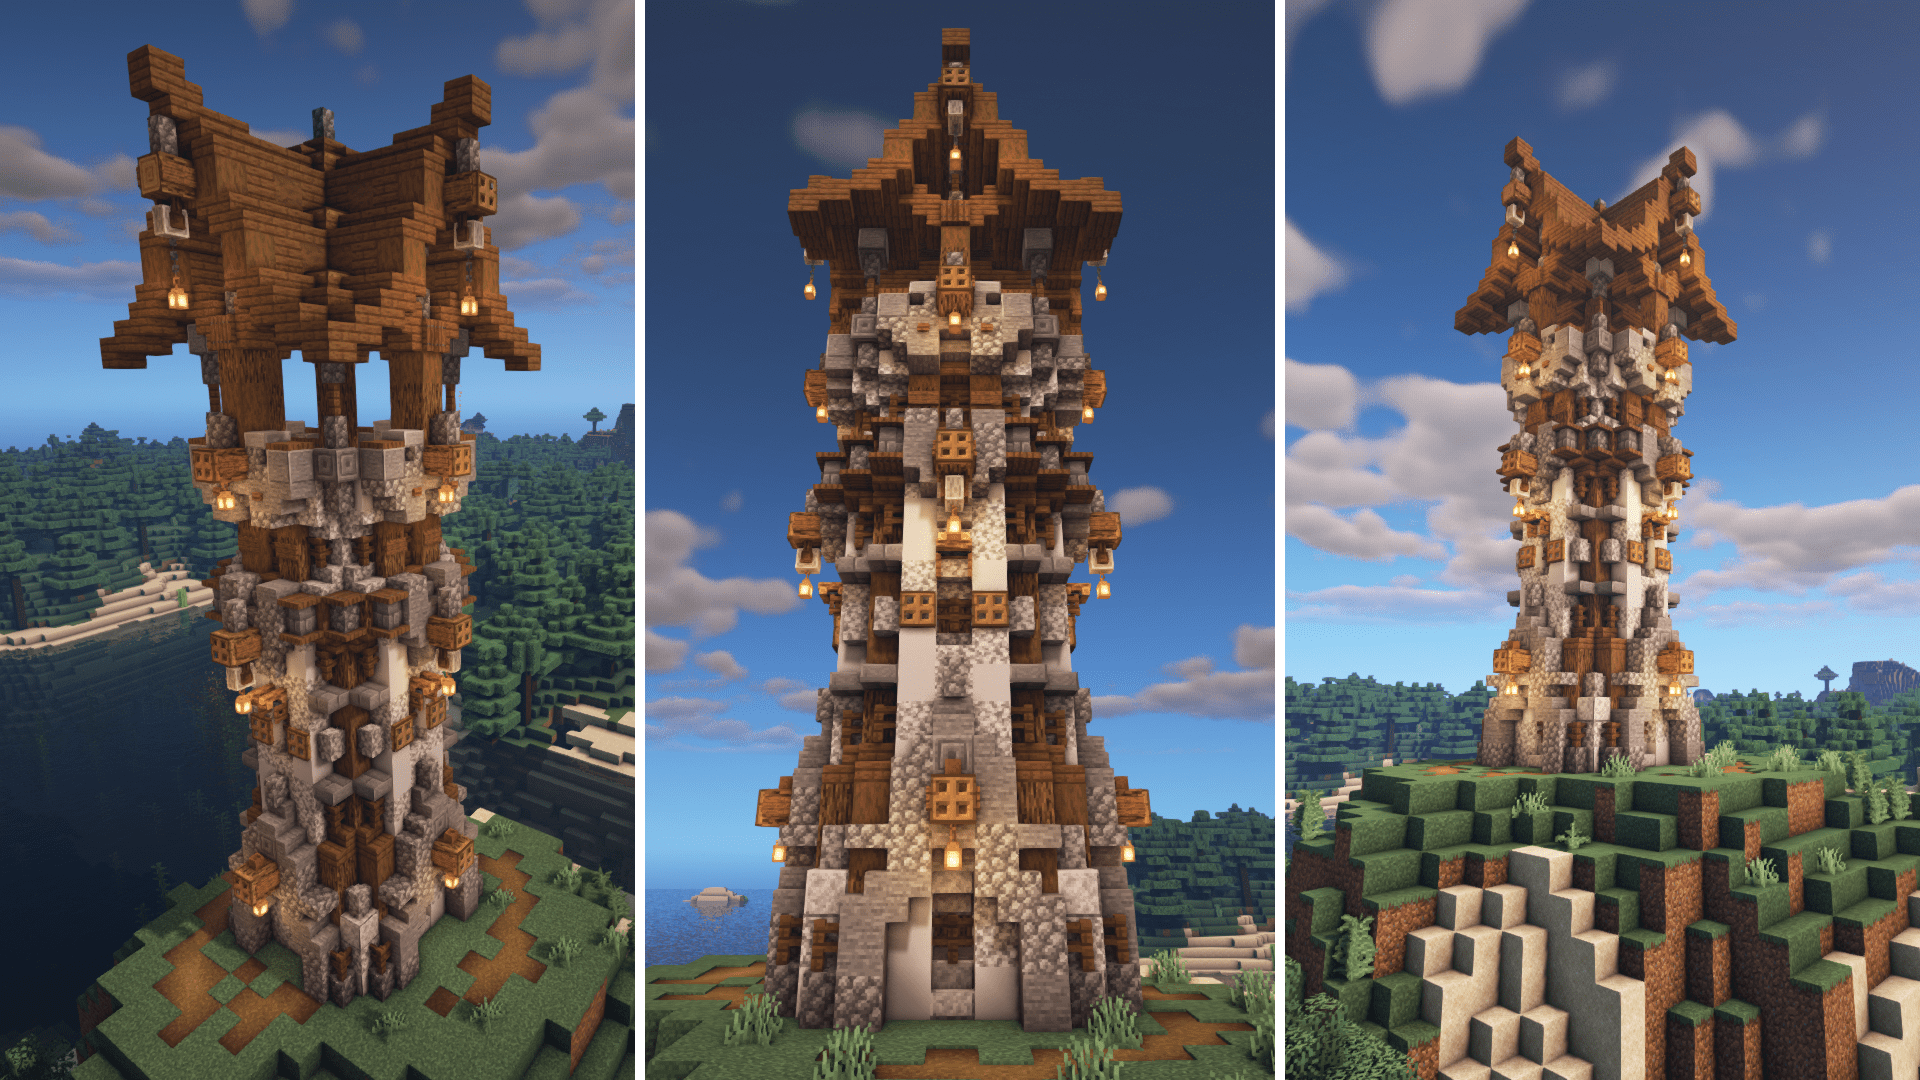
A watchtower is a useful and cool thing to build in Minecraft. You can create a watchtower that will protect you from mobs and will give you a better view of your surroundings. You can also use different materials and designs to create your watchtower.
The size of your watchtower depends on your preference and purpose. You can build a large watchtower if you want to have more space and features, such as multiple floors, windows, balconies, ladders, or stairs. You can also build a medium-sized watchtower if you want to have a simpler and faster structure, such as a single floor, a door, a roof, and a fence.
Here are some steps on how to build a medium-sized watchtower in Minecraft:
- First, you need to find a suitable location for your watchtower. You can build your watchtower on a hill, on a wall, or anywhere else you like. You need to have enough space and a flat surface to build your watchtower.
- Second, you need to gather the materials for your watchtower. You need to have wood planks, wood stairs, wood slabs, fences, doors, torches, and other items that you want to use for your watchtower. You can use any type of wood, such as oak, spruce, birch, or dark oak.
- Third, you need to build the base of your watchtower. You can use wood planks to create a square or rectangular shape for your base. You can also use wood stairs to create corners for your base. You can make your base as big or as small as you want, depending on the size of your watchtower. For this example, let’s say we want to make a base of 5 blocks by 5 blocks.
- Fourth, you need to build the walls of your watchtower. You can use wood planks to create vertical columns that rise from the edges of your base. You can also use fences to create gaps between the columns for windows. You can make your walls as tall or as short as you want, depending on the height of your watchtower. For this example, let’s say we want to make walls of 4 blocks high.
- Fifth, you need to build the roof of your watchtower. You can use wood slabs to create a flat or sloped surface that covers the top of your walls. You can also use wood stairs to create edges for your roof. You can also use fences or trapdoors to create a railing around your roof.
- Sixth, you need to add a door and some torches to your watchtower. You can use a door to create an entrance for your watchtower. You can also use torches to light up your watchtower inside and outside.
- Seventh, you need to decorate and customize your watchtower. You can use banners, signs, paintings, item frames, or armor stands to add some details and personality to your watchtower.
You have successfully built a medium-sized watchtower in Minecraft. You can enjoy the security and sight of your watchtower in your world. You can also improve and expand your watchtower by adding more floors, features, or decorations. Building a watchtower can be a fun and rewarding activity in Minecraft.
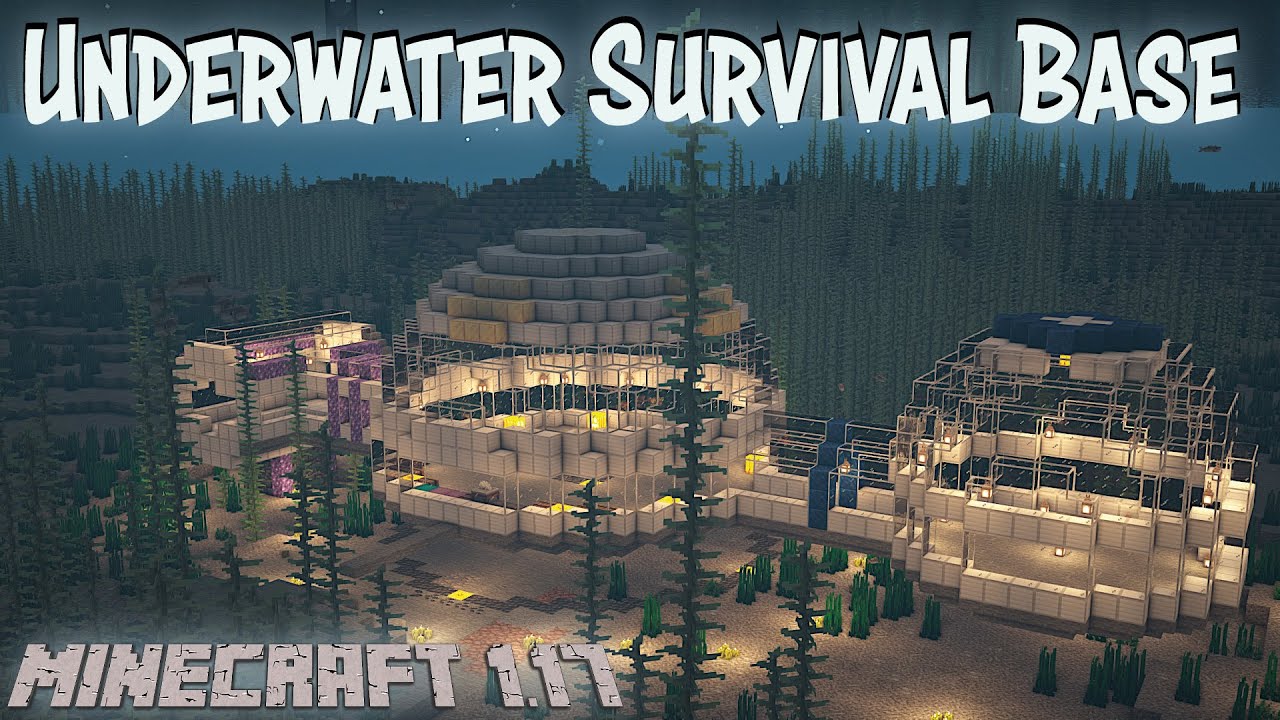
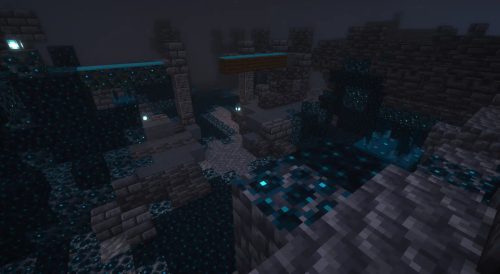
14. Underwater Base
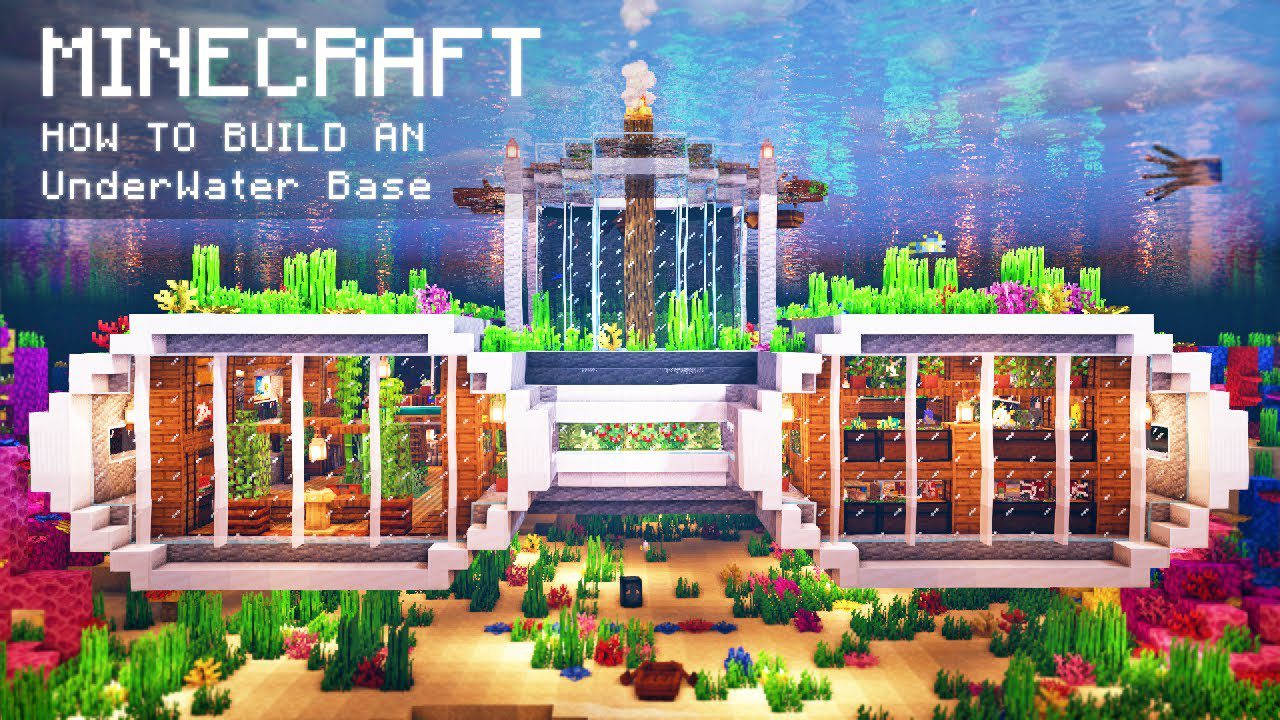
An underwater base is an amazing thing to build in Minecraft. You can create an underwater base that is submerged and hidden. You can also explore and discover new things in your underwater base. However, you need to have some patience and skills to build an underwater base. Here are some tips on how to build an underwater base in Minecraft:
- First, you need to find a suitable location for your underwater base. You can build your underwater base under an ocean, under a lake, or under a river. You need to have enough depth and space to build your underwater base.
- Second, you need to clear out the water from the area for your underwater base. You can use tools such as sponges, sand, gravel, or pistons to remove and block the water that is in your way. You can also use torches, doors, signs, or ladders to create air pockets that allow you to breathe and see underwater.
- Third, you need to design and build the structures and features of your underwater base. You can use blocks such as glass, prismarine, or sea lanterns to create the walls, floors, and ceilings of your underwater base. You can also use stairs, slabs, fences, doors, windows, and other items to create details and features for your underwater base. You can also use redstone, command blocks, pistons, and other mechanisms to create functions and interactions for your underwater base.
- Fourth, you need to decorate and customize your underwater base. You can use plants, coral, kelp, seagrass, and other items to add some greenery and color to your underwater base. You can also use paintings, banners, signs, item frames, or armor stands to add some personality and style to your underwater base. You can also use chests, barrels, hoppers, dispensers, or droppers to store and sort your items in your underwater base.
- Fifth, you need to populate and protect your underwater base. You can use spawn eggs, mob spawners, or commands to spawn different types of mobs in your underwater base. You can also use name tags, leads, saddles, or carrots on sticks to tame and transport your mobs in your underwater base. You can also use villagers, iron golems, snow golems, or cats to create a community and protect your underwater base.
You have successfully built an underwater base in Minecraft. You can enjoy the challenge and adventure of living in your underwater base in your world. You can also invite your friends to visit your underwater base and share your experience. Building an underwater base can be a fun and rewarding activity in Minecraft.
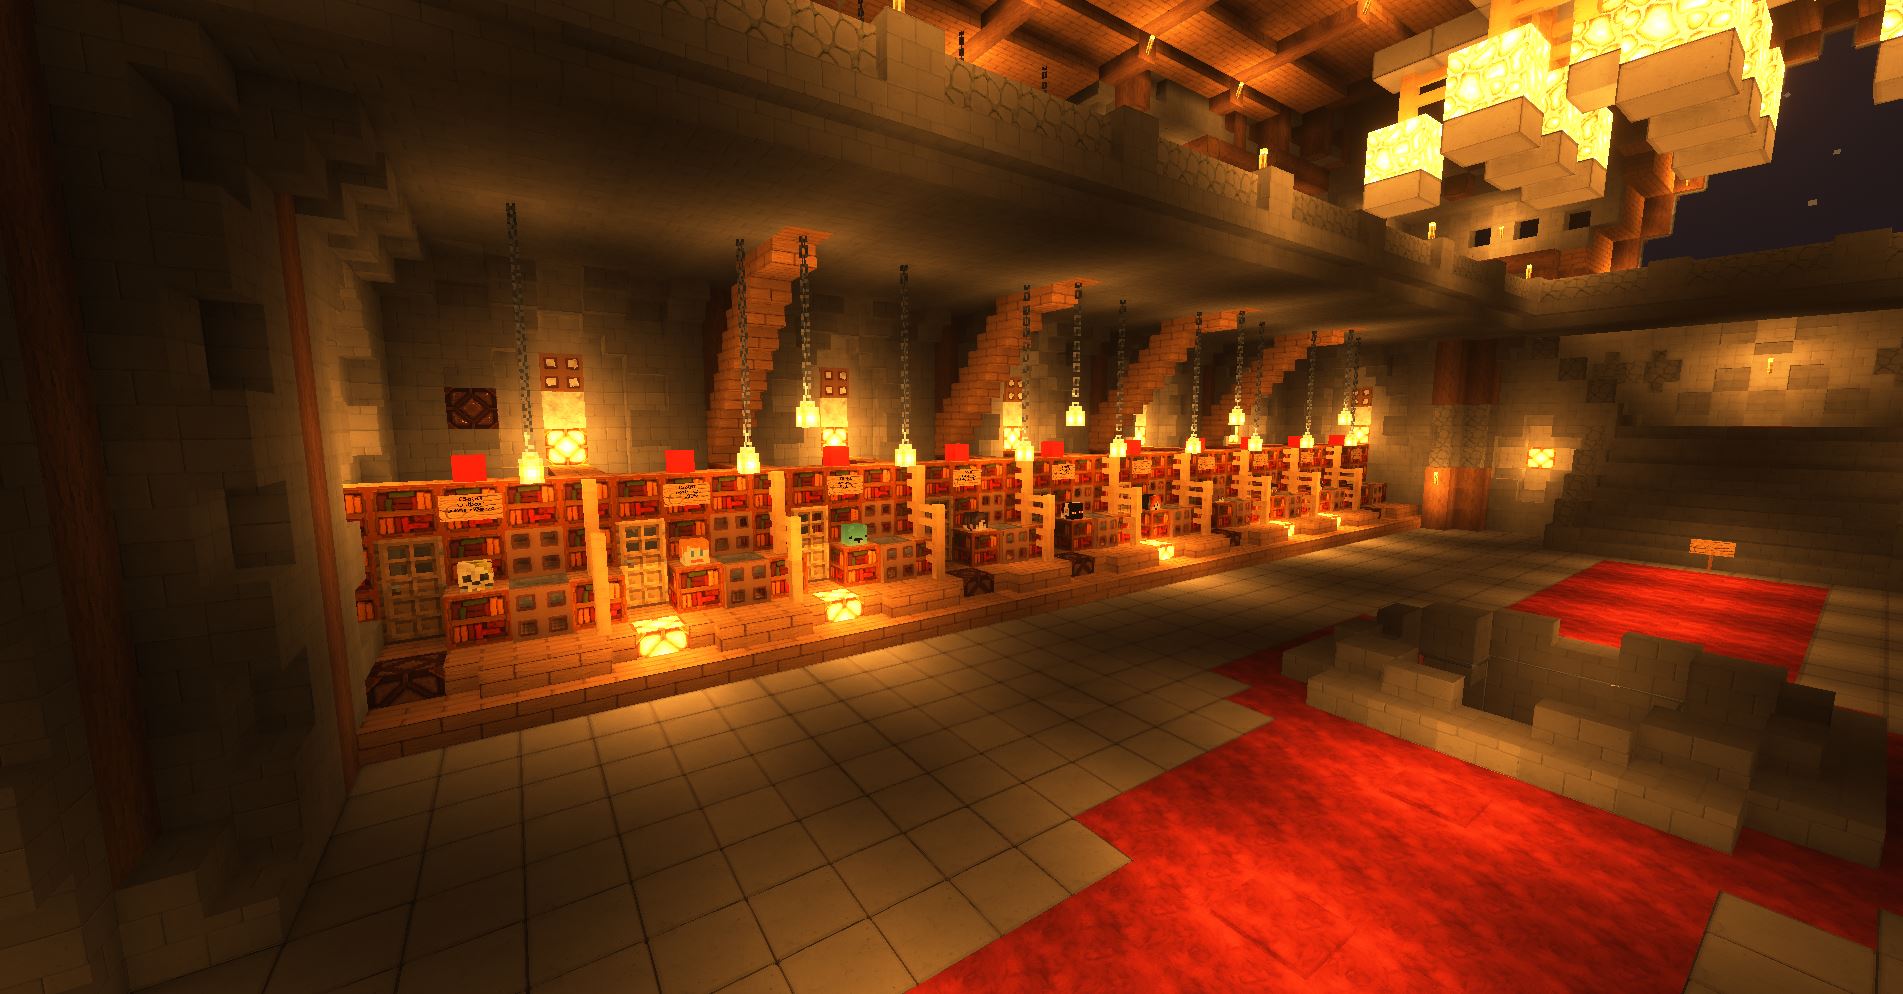
15. Library
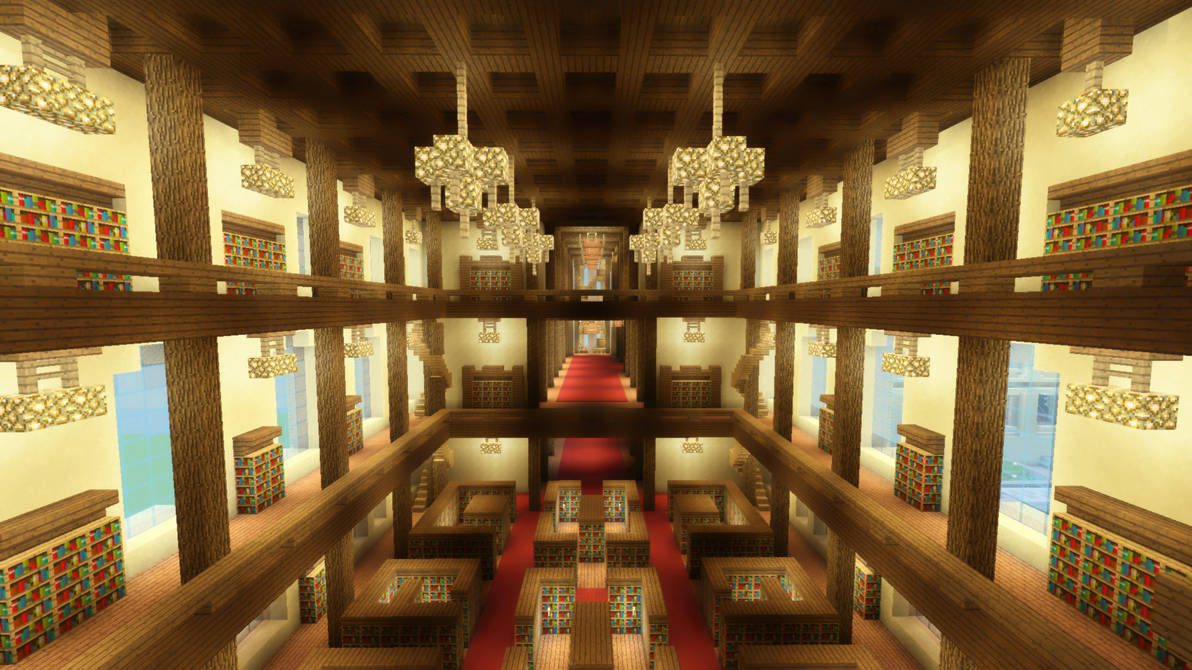
A library is a wonderful thing to build in Minecraft. You can create a library that is full of books, knowledge, and beauty. You can also use different materials and designs to create your library. Here are some tips on how to build a library in Minecraft:
- First, you need to find a suitable location for your library. You can build your library in a village, in a castle, or anywhere else you like. You need to have enough space and a flat surface to build your library.
- Second, you need to gather the materials for your library. You need to have books, bookshelves, wood planks, wood stairs, wood slabs, glass blocks, glass panes, doors, torches, and other items that you want to use for your library. You can use any type of wood, such as oak, spruce, birch, or dark oak. You can also use different colors of glass to create different effects for your library.
- Third, you need to build the walls and the roof of your library. You can use wood planks to create the walls and the roof of your library. You can also use wood stairs and wood slabs to create curves and edges for your walls and roof. You can also use glass blocks or glass panes to create windows for your library. You can make your walls and roof as high or as low as you want, depending on the size of your library.
- Fourth, you need to build the floor and the entrance of your library. You can use wood planks or wood slabs to create the floor of your library. You can also use carpets, rugs, or banners to add some color and texture to your floor. You can also use doors to create an entrance for your library. You can also use signs, paintings, item frames, or armor stands to add some details and features to your entrance.
- Fifth, you need to build the bookshelves and the books of your library. You can use bookshelves to create rows and columns of books along the walls of your library. You can also use books to fill the gaps between the bookshelves or to create stacks of books on the floor or on the tables of your library. You can also use enchanting tables, lecterns, or maps to add some magic and variety to your books.
- Sixth, you need to build the cozy corner of your library. You can use wood planks or wood slabs to create a small platform that is attached to one of the walls of your library. You can also use fences or trapdoors to create a railing around your platform. You can also use beds, sofas, chairs, tables, lamps, or candles to make your cozy corner more comfortable and cozy. You can also use flowers, plants, vines, or paintings to decorate your cozy corner.
You have successfully built a library in Minecraft. You can enjoy the beauty and knowledge of your library in your world. You can also invite your friends to visit your library and share your books. Building a library can be a fun and rewarding activity in Minecraft.
You May Also Like

This post has no comments yet. Be the first — your comment will appear here.